Oktober Bautista aka "Oktober B. Munchin"
Project Brief
Design an internet-connected device that utilizes at least two sensors. You can choose any sensors, such as a button, potentiometer, or photocell sensor. This device will collect data in your home over the course of one week.
Consider where you plan to install it and how it will be powered. Additionally, determine if you need any mechanical components to facilitate the interaction with your sensors, such as levers, pulleys, or springs.
Think about how frequently you will save this data to the database. Keep in mind any limitations—such as the maximum of 30 data points per feed on Adafruit IO—and assess the necessity of collecting repeated values versus only updated values.
∙ Create a software program to obey your interface
∙ Create a sketch that will access the data and represent it visually
∙ Create a sketch that will access the data and represent it visually
Connecting Arduino and P5.js
A week ago, I followed along with a workshop class led by my professor on setting up the connection between my board and P5.js and had lots of fun doing so. I learned to do something that is so mundane in our everyday lives connecting between devices, but that is so incredibly fascinating when you are the one actually in the back end making that happen! Oh, the intricacies! After the workshop, we went through the brief and started to think of what data I wanted to collect that is something of interest to me.
What Kind of Data Should I Collect?
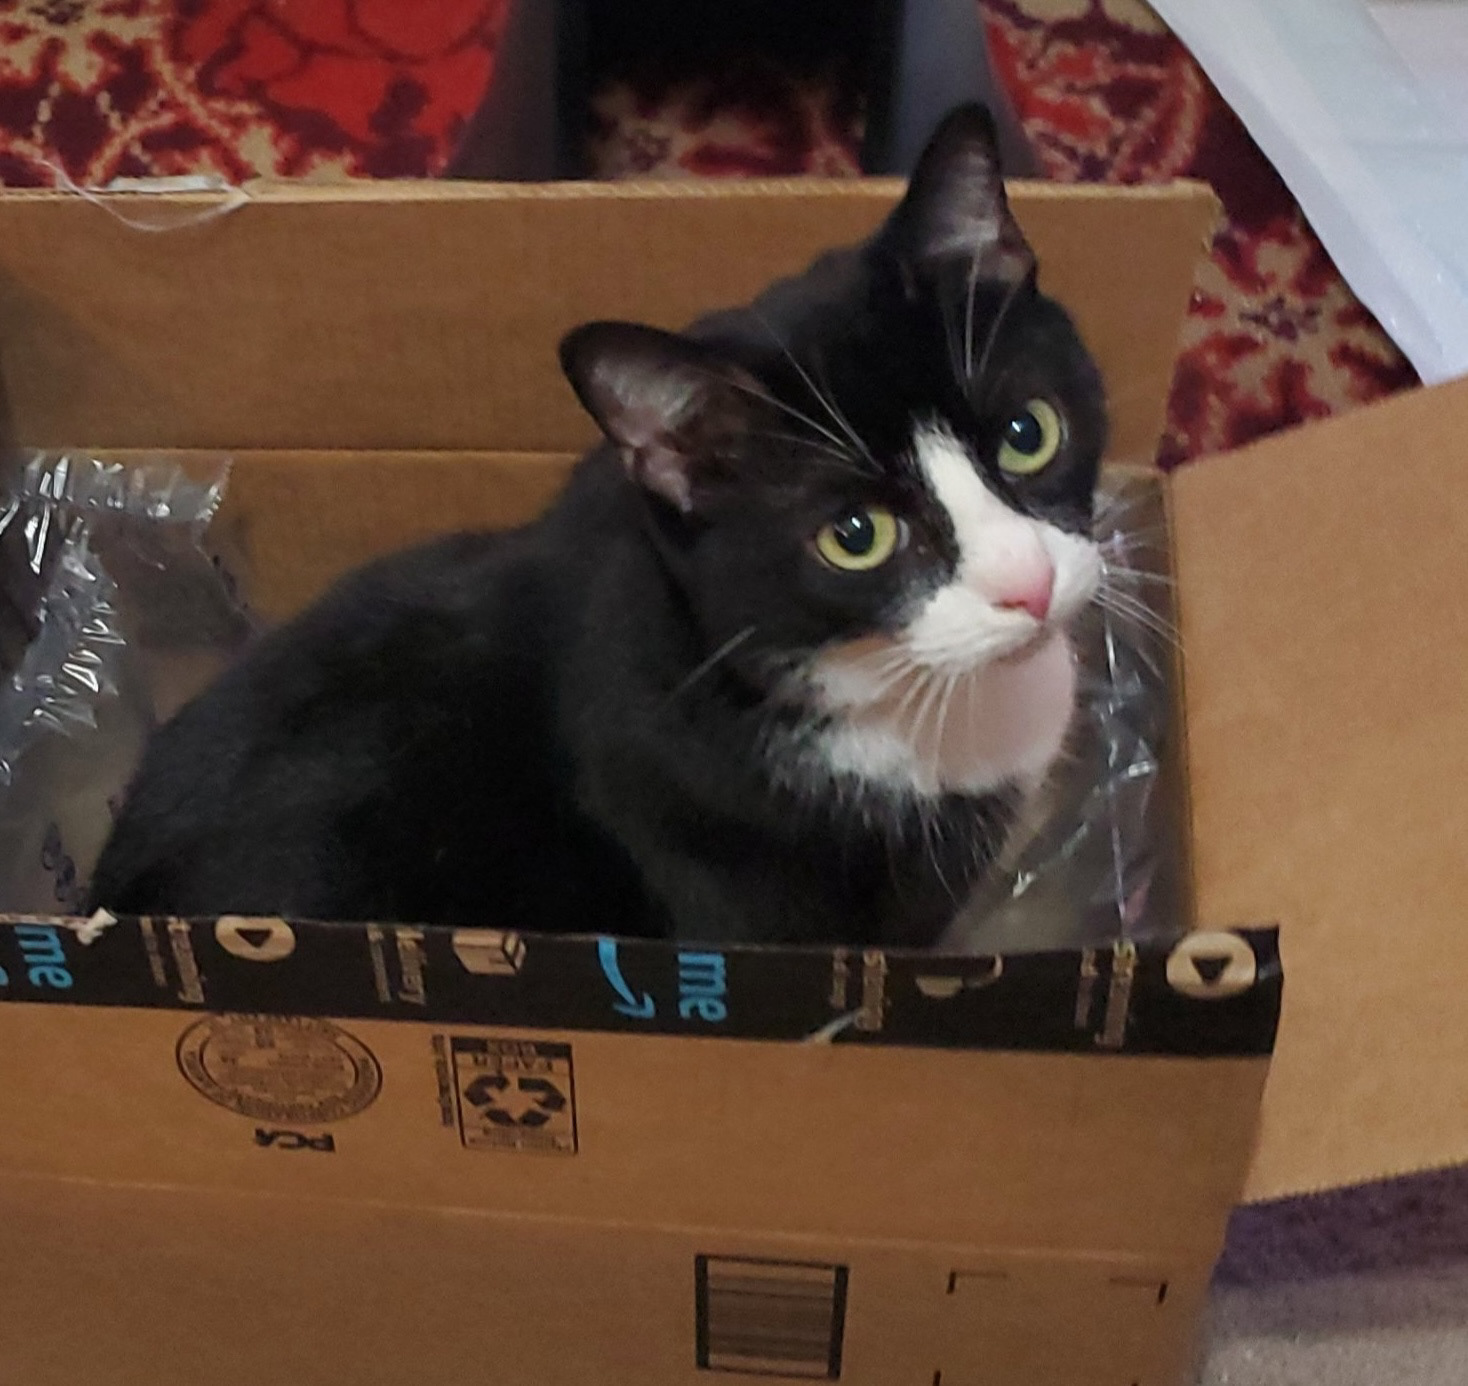
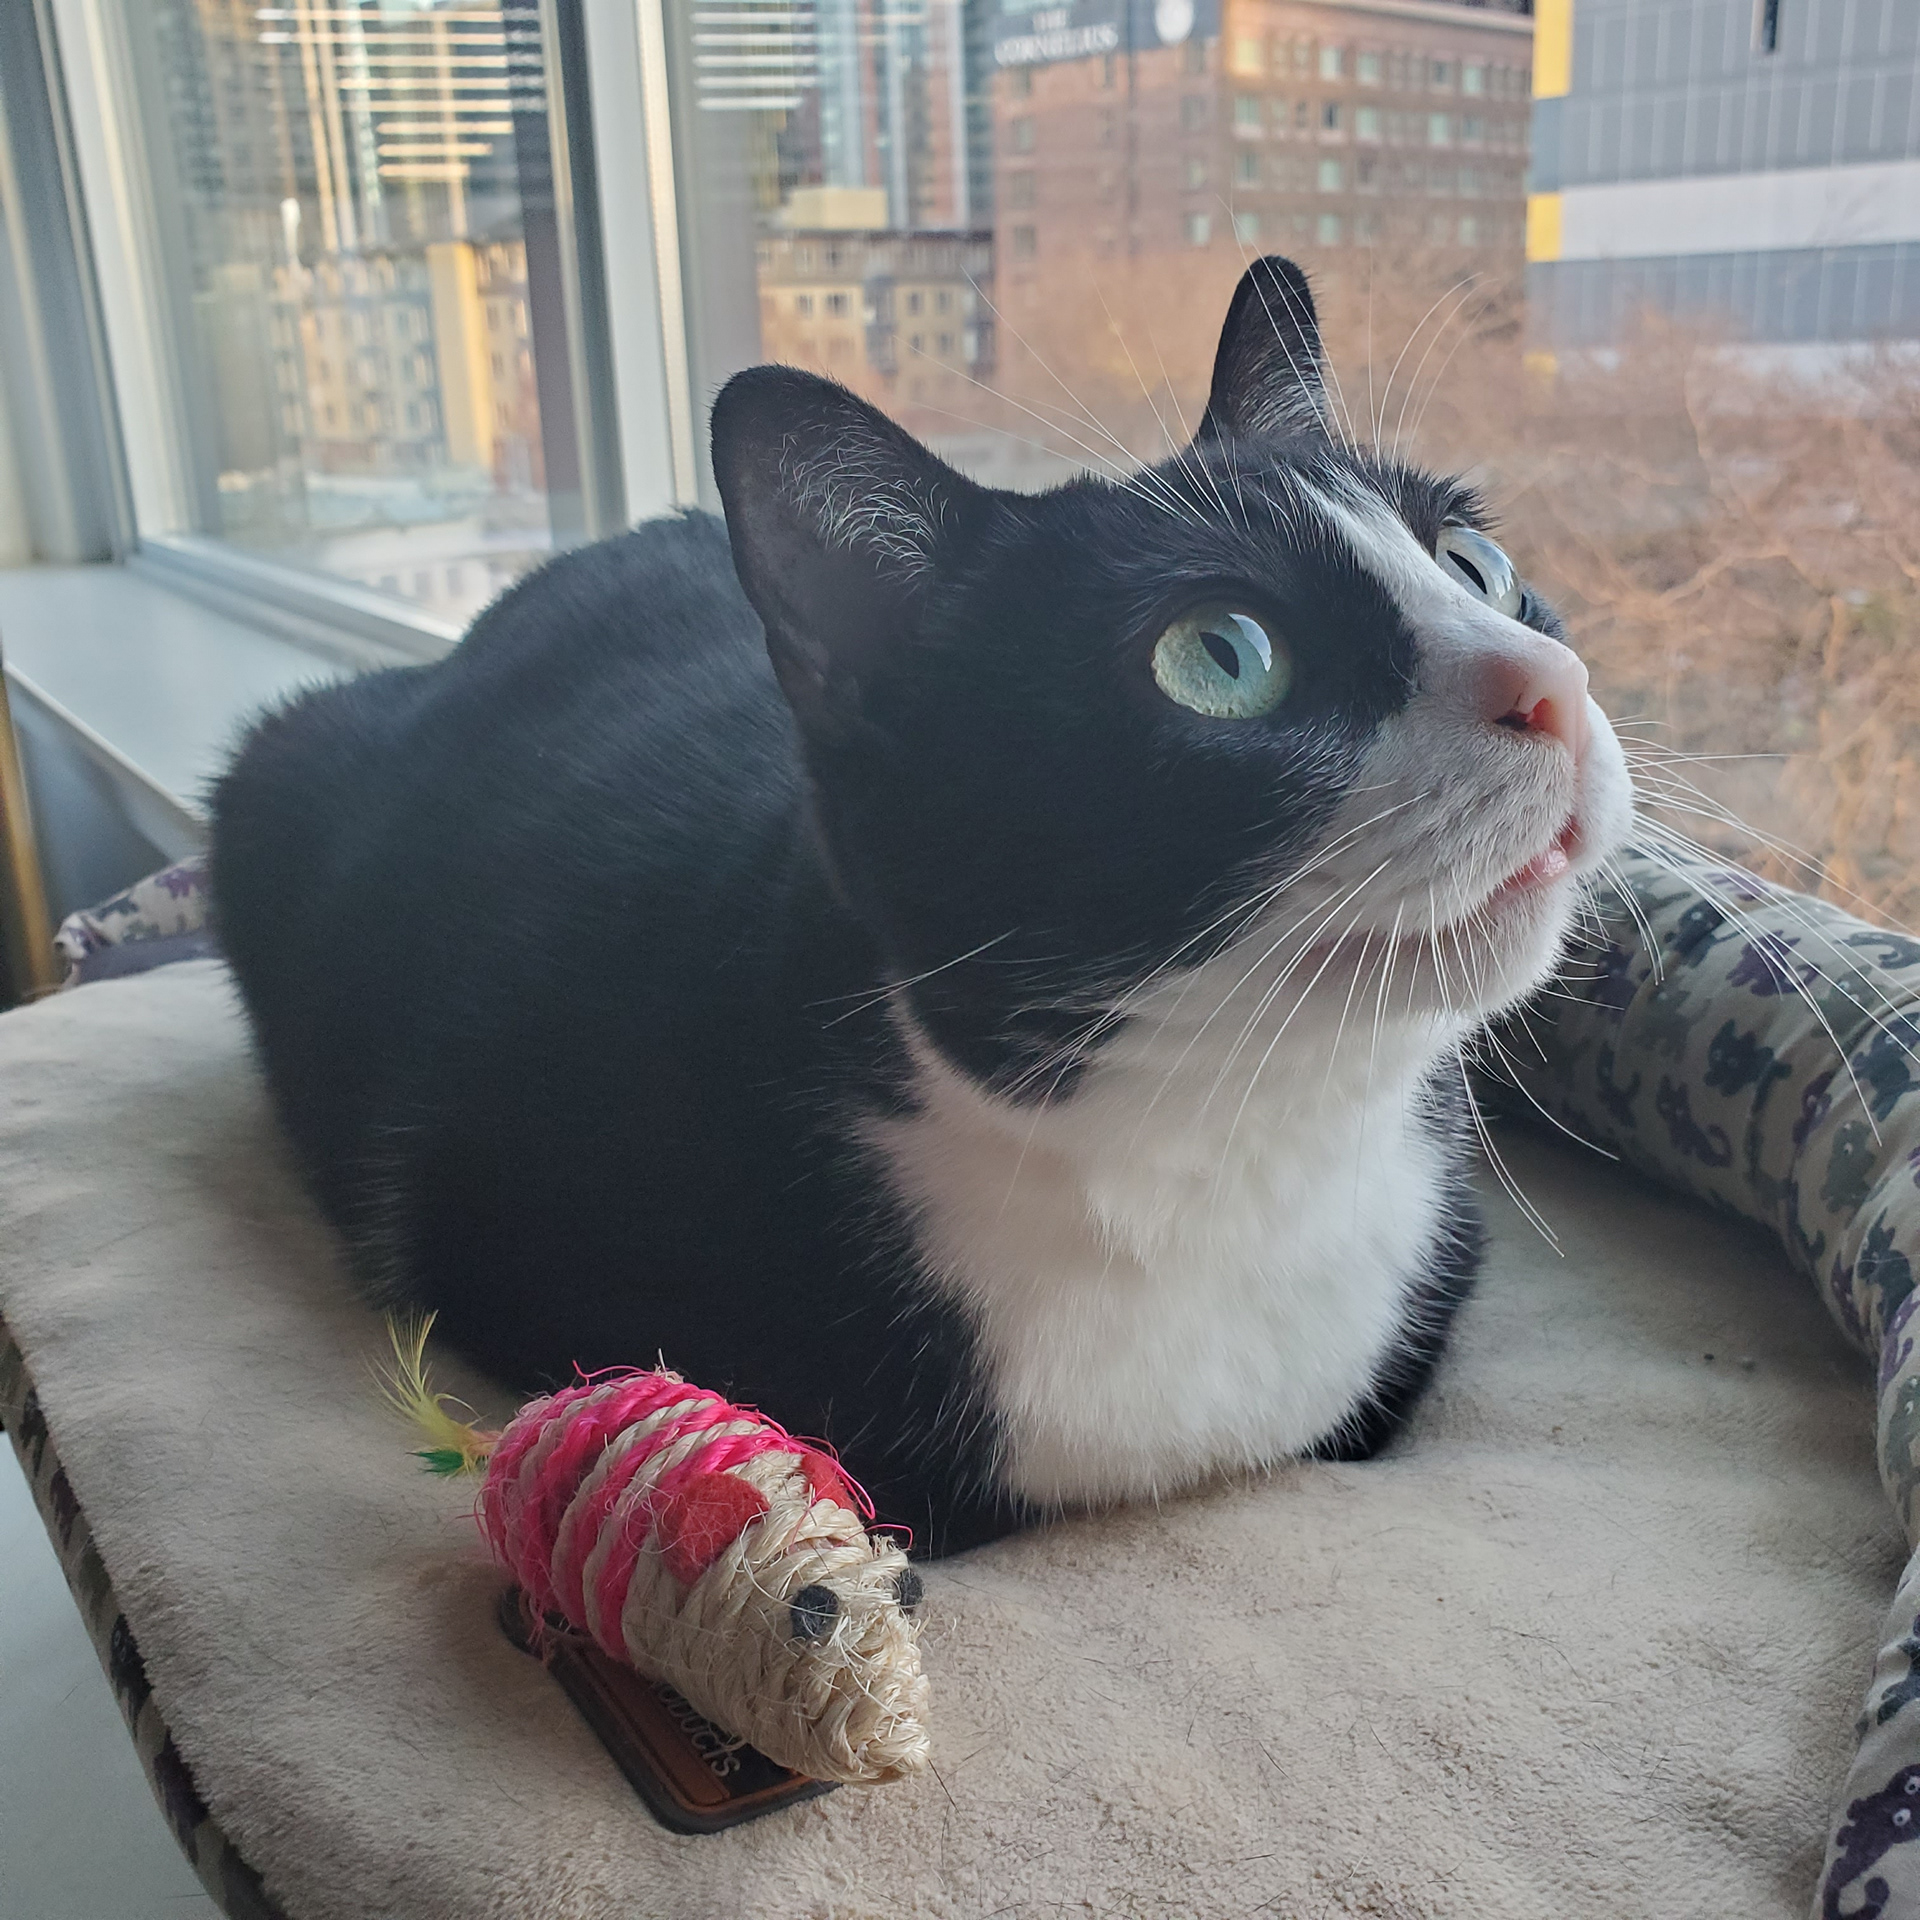
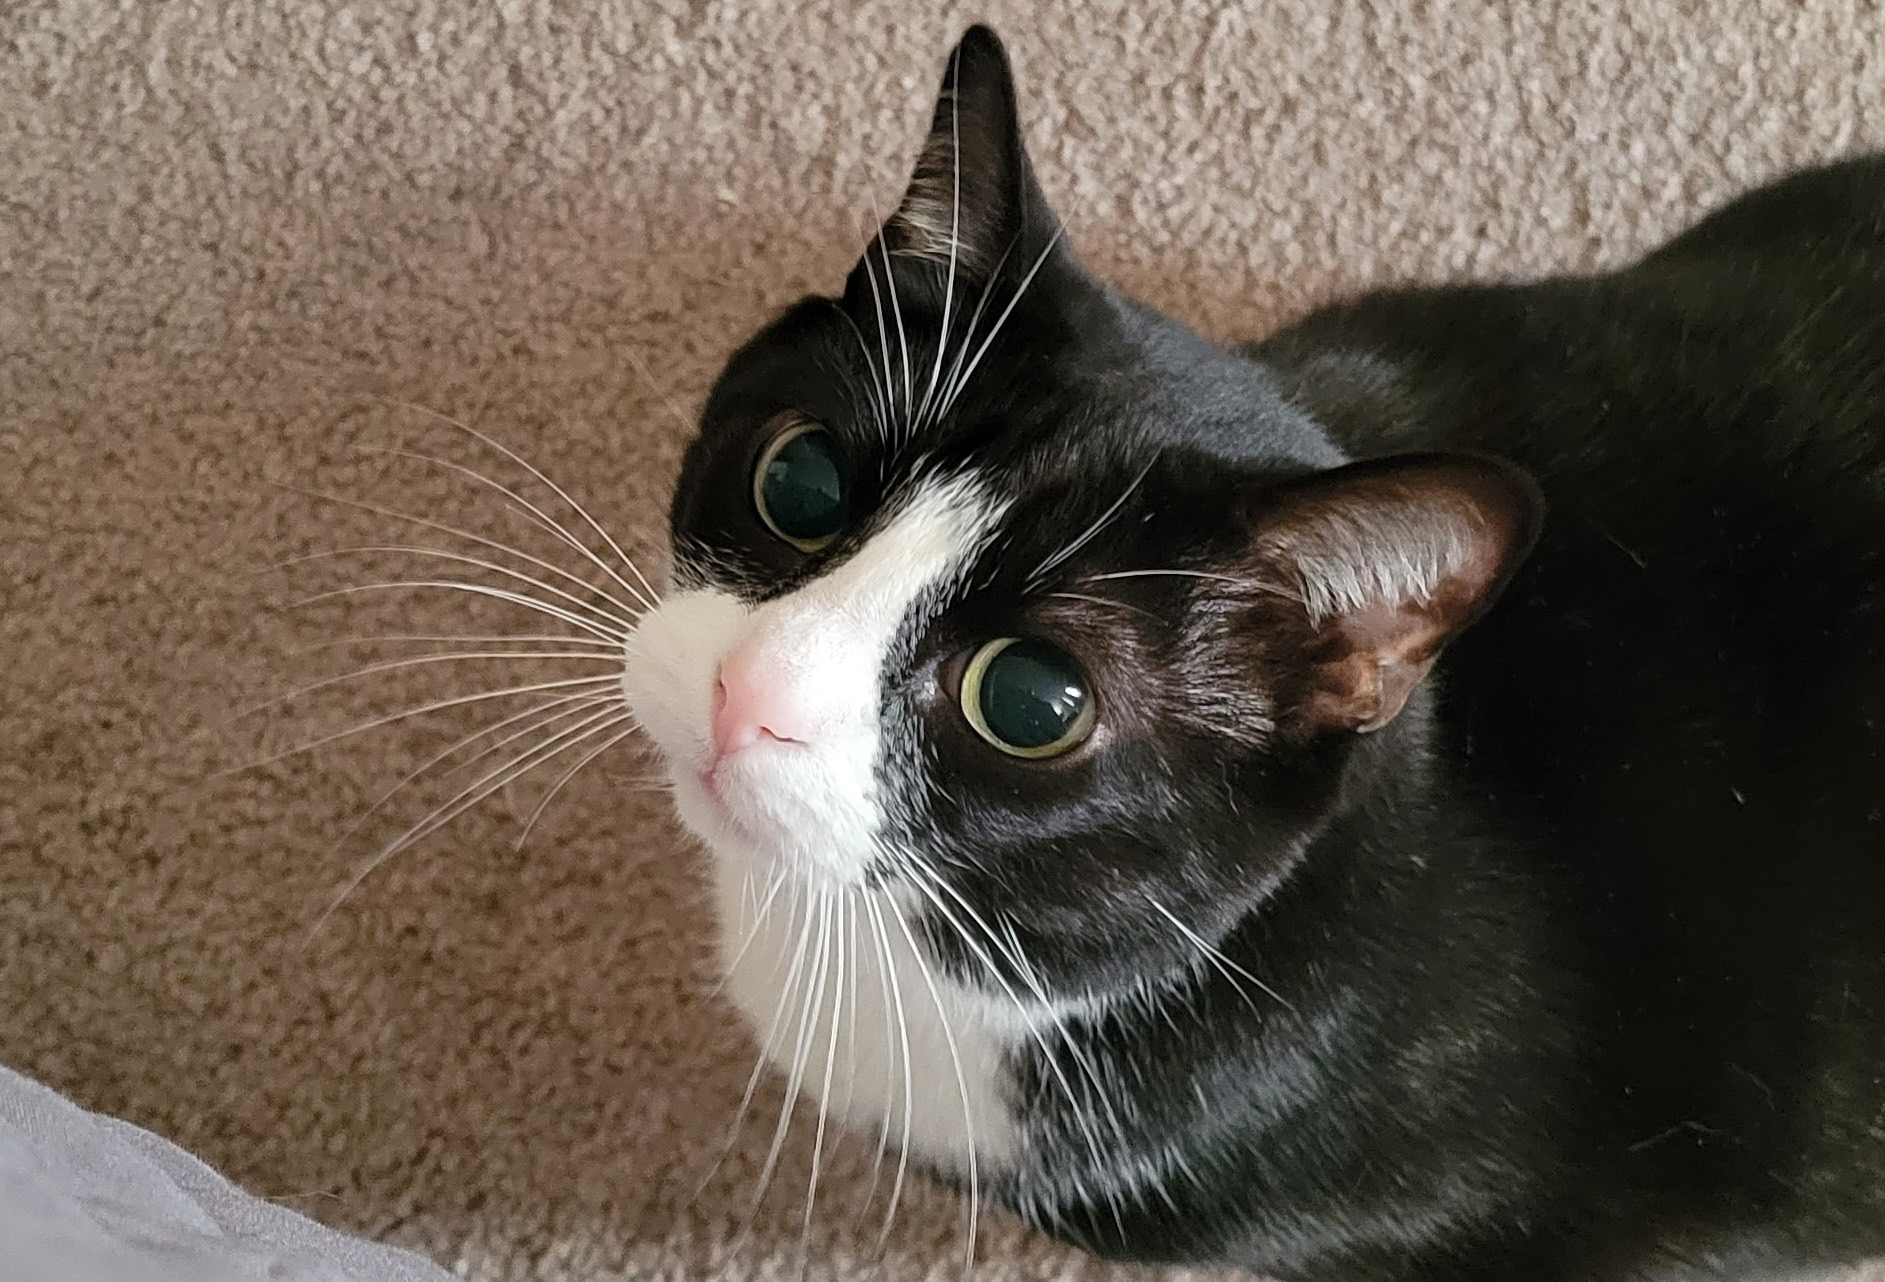
My cat, Oktober, is a cute little chonky tuxedo cat, who very much enjoys her meal times. When Alexa reminds the whole house that it is time to "Feed Oktober", those piercing eyes of hers lock in with yours and you know she means business. Yes, she is a timely cat. Even when it is not yet time for food, she will stare until you do.
Puzzled, I wondered what her eating patterns were—at what time of the day does she eat the most? Is it in moderation? Does she just eat all her food in one sitting or throughout the day? So many questions...perhaps Schrödinger’s cat can lend a paw, though knowing her, she'd probably eat the food whether observed or not. (If you know, you know)
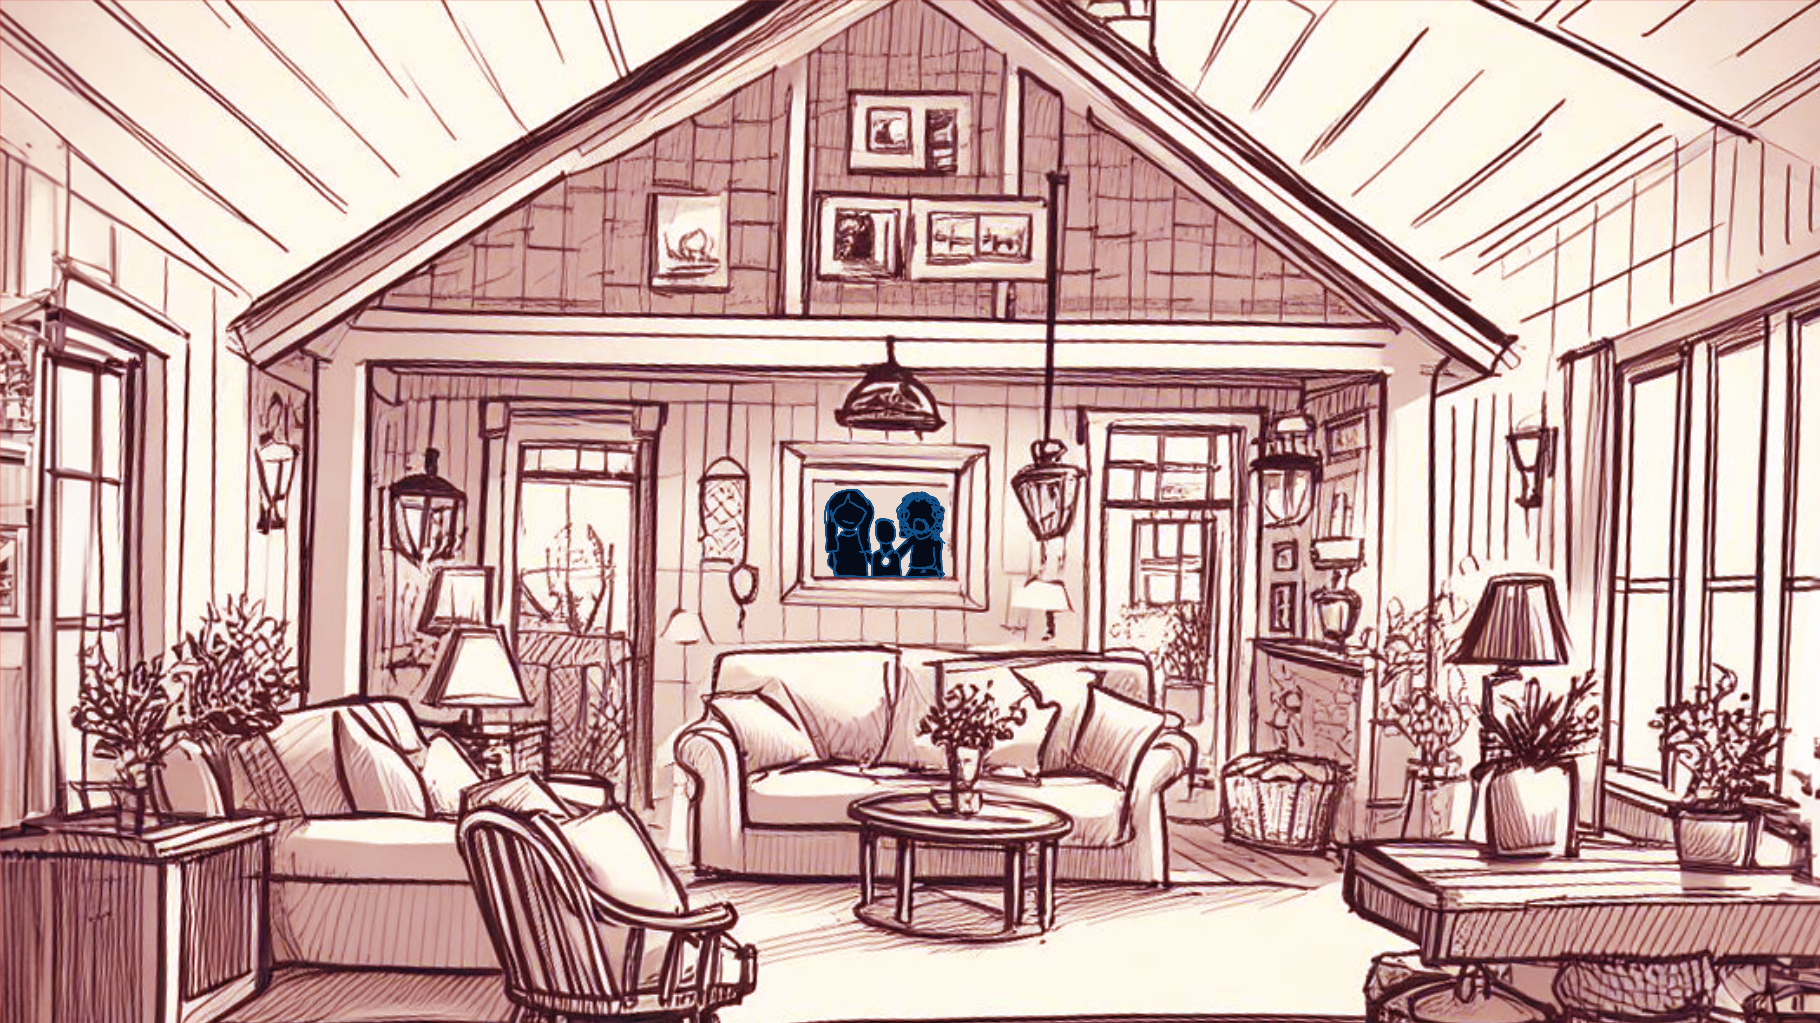
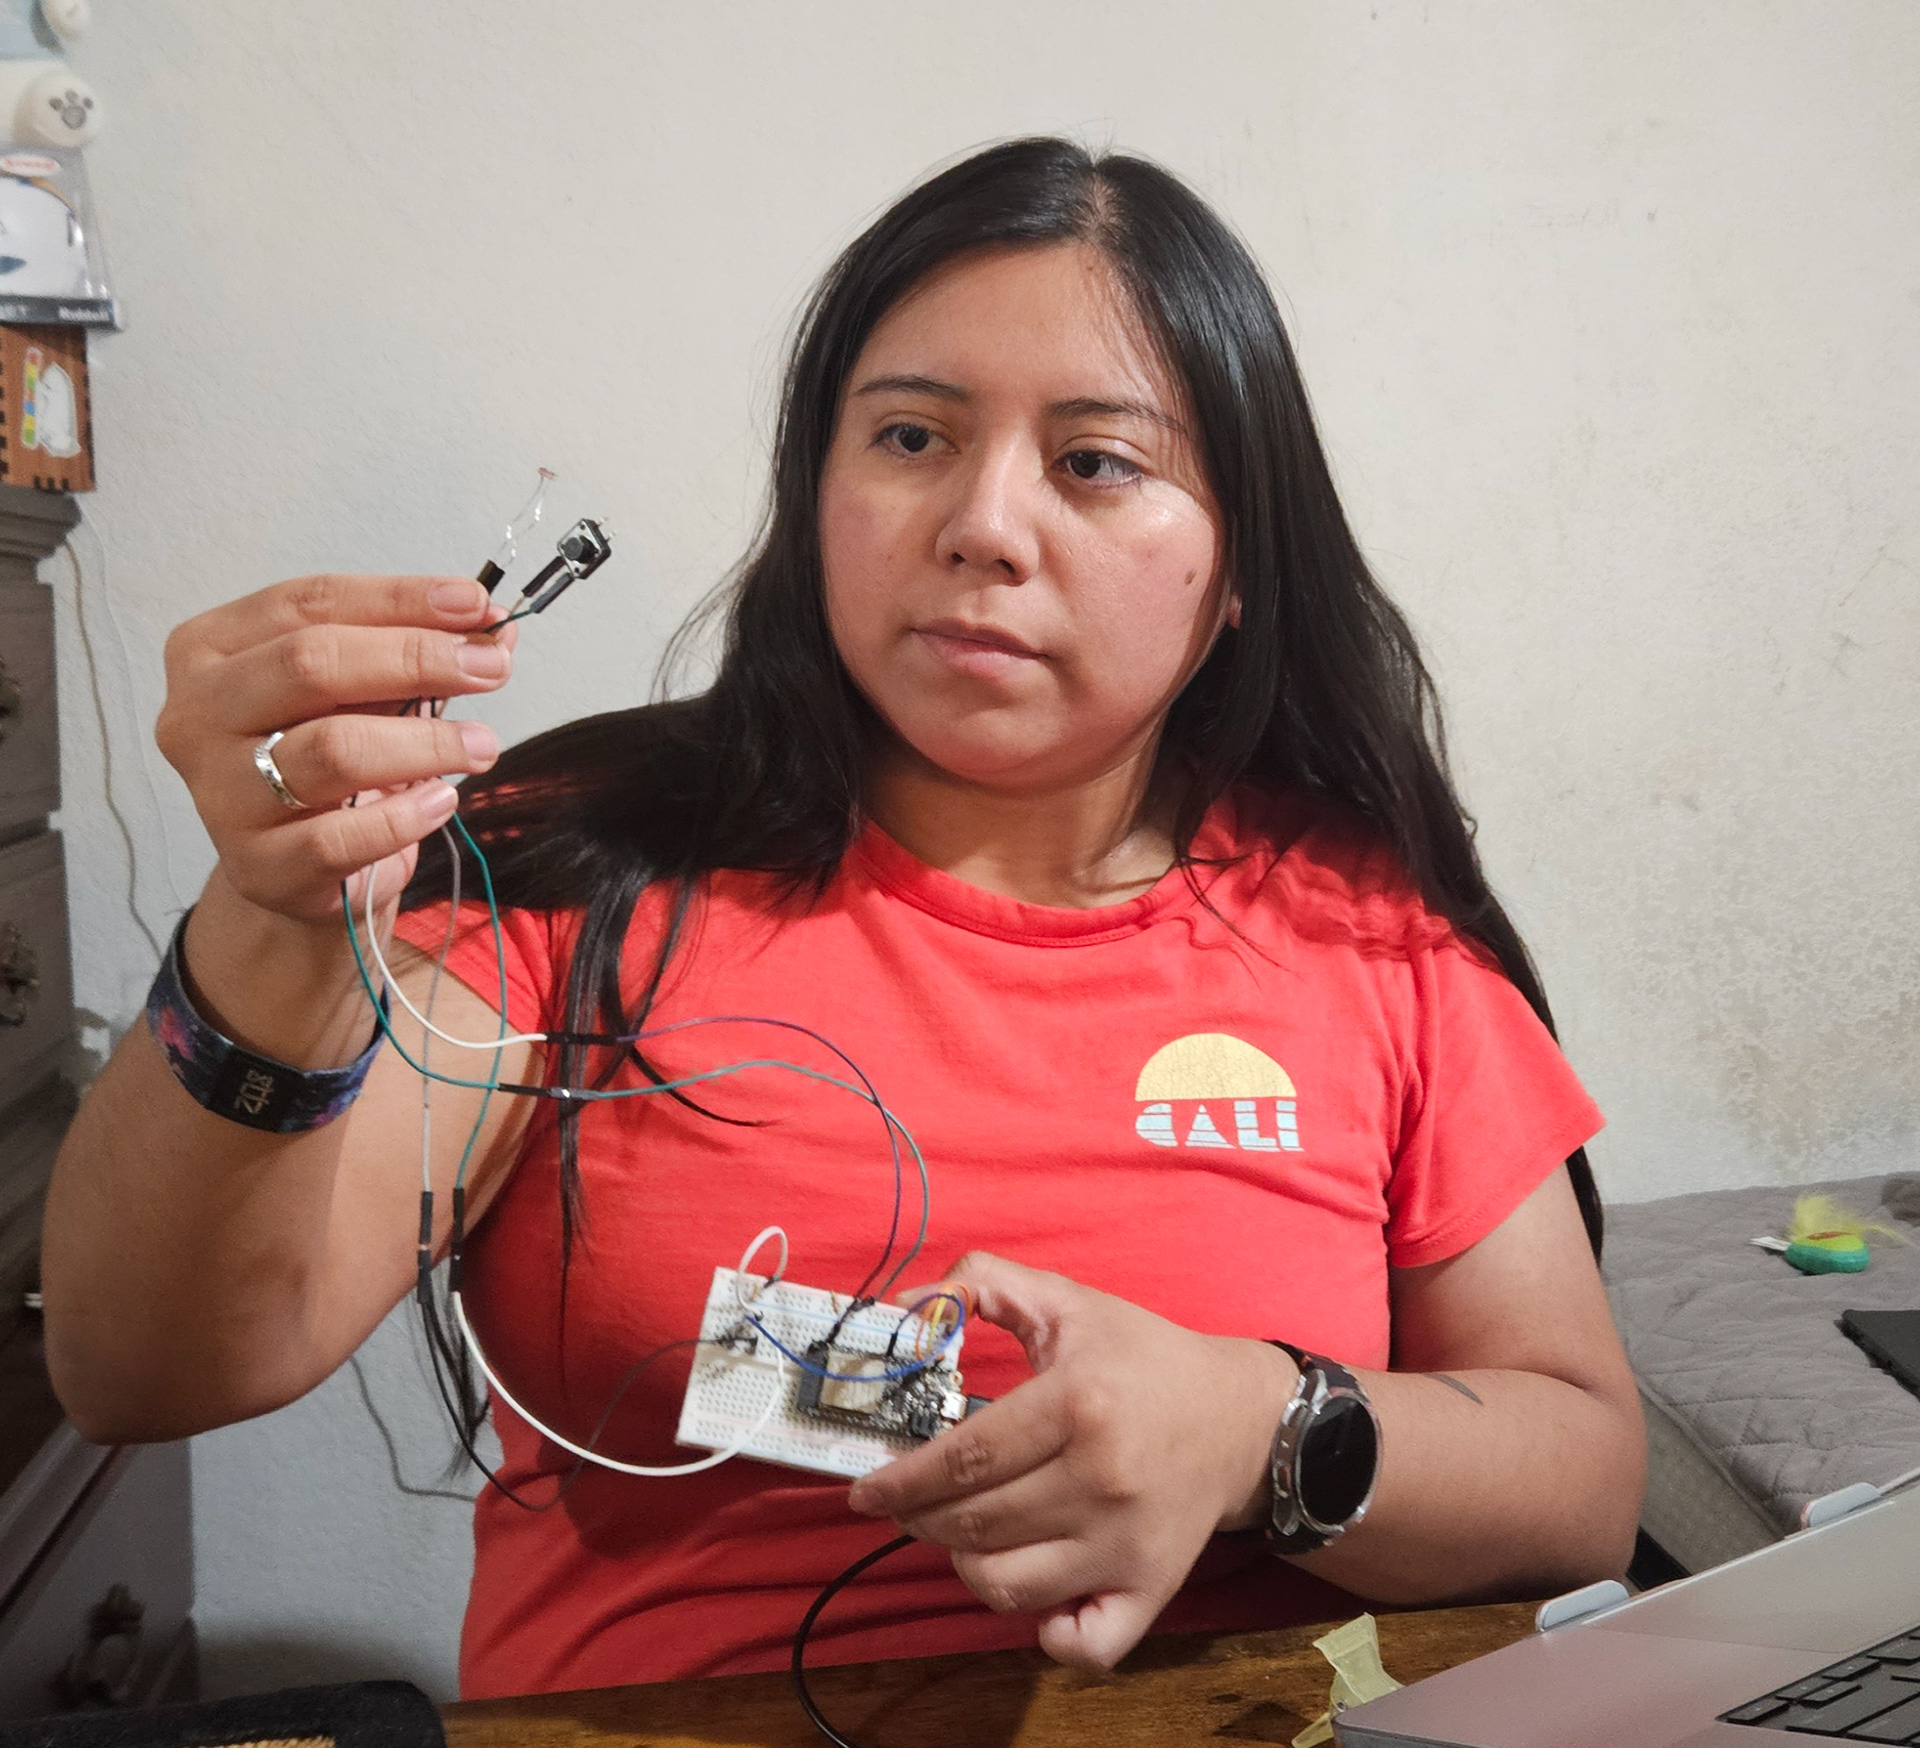
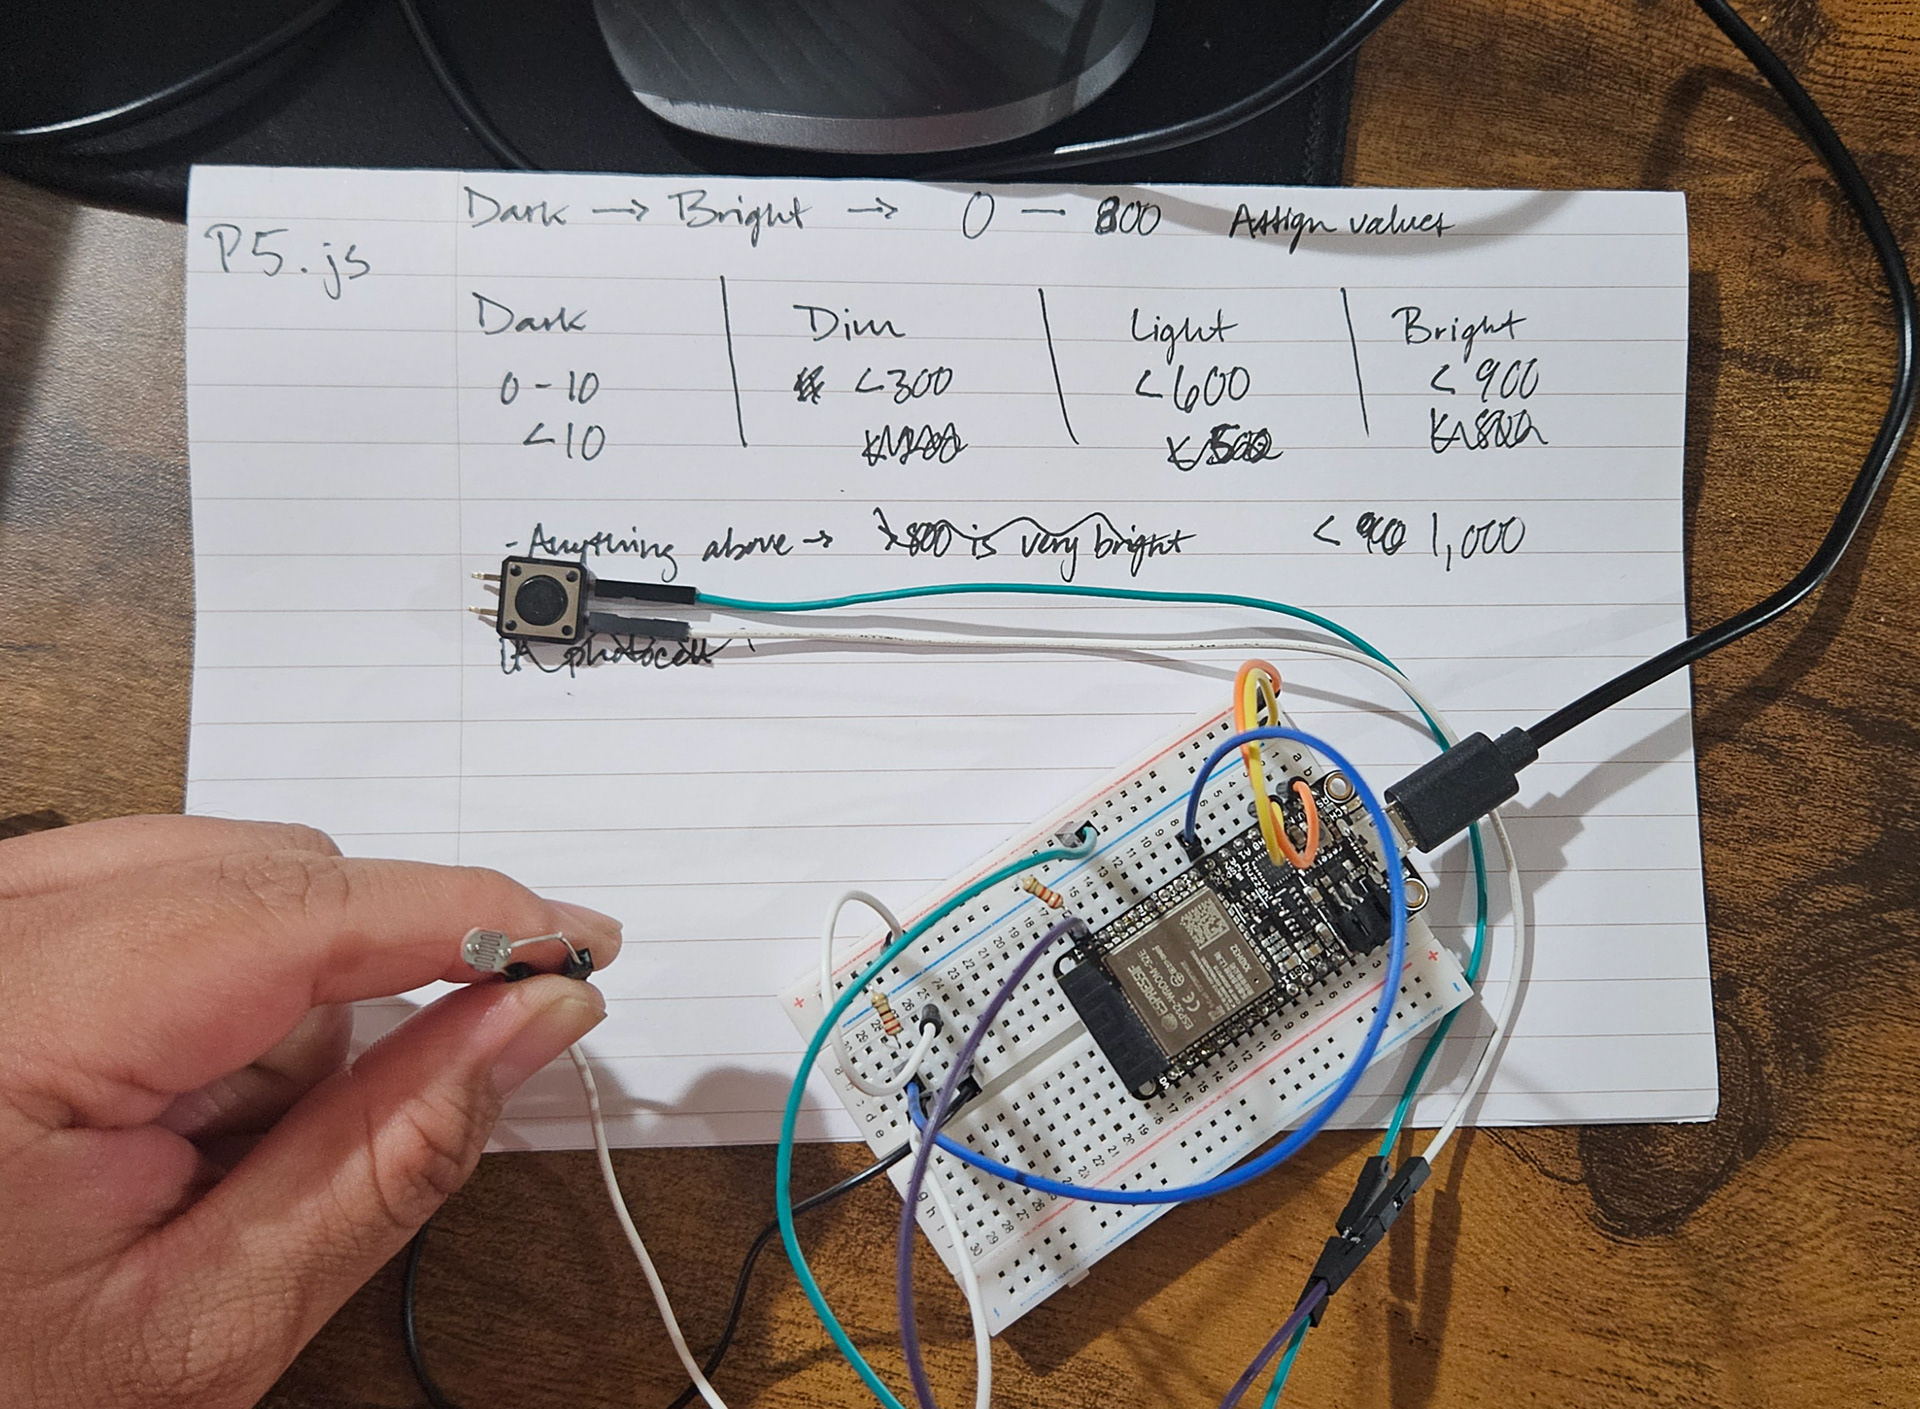
Once I identified the specific data I wanted to collect, I shifted my focus to effectively organizing the board and its components within Oktober’s food space.
To create a safe and functional setup, I thought about how Oktober would interact with the cables and decided to adjust her food setup. I relocated her food mat and bowl to my desk to ensure I have enough space to place and conceal the Arduino board, which will be plugged in overnight to collect data.
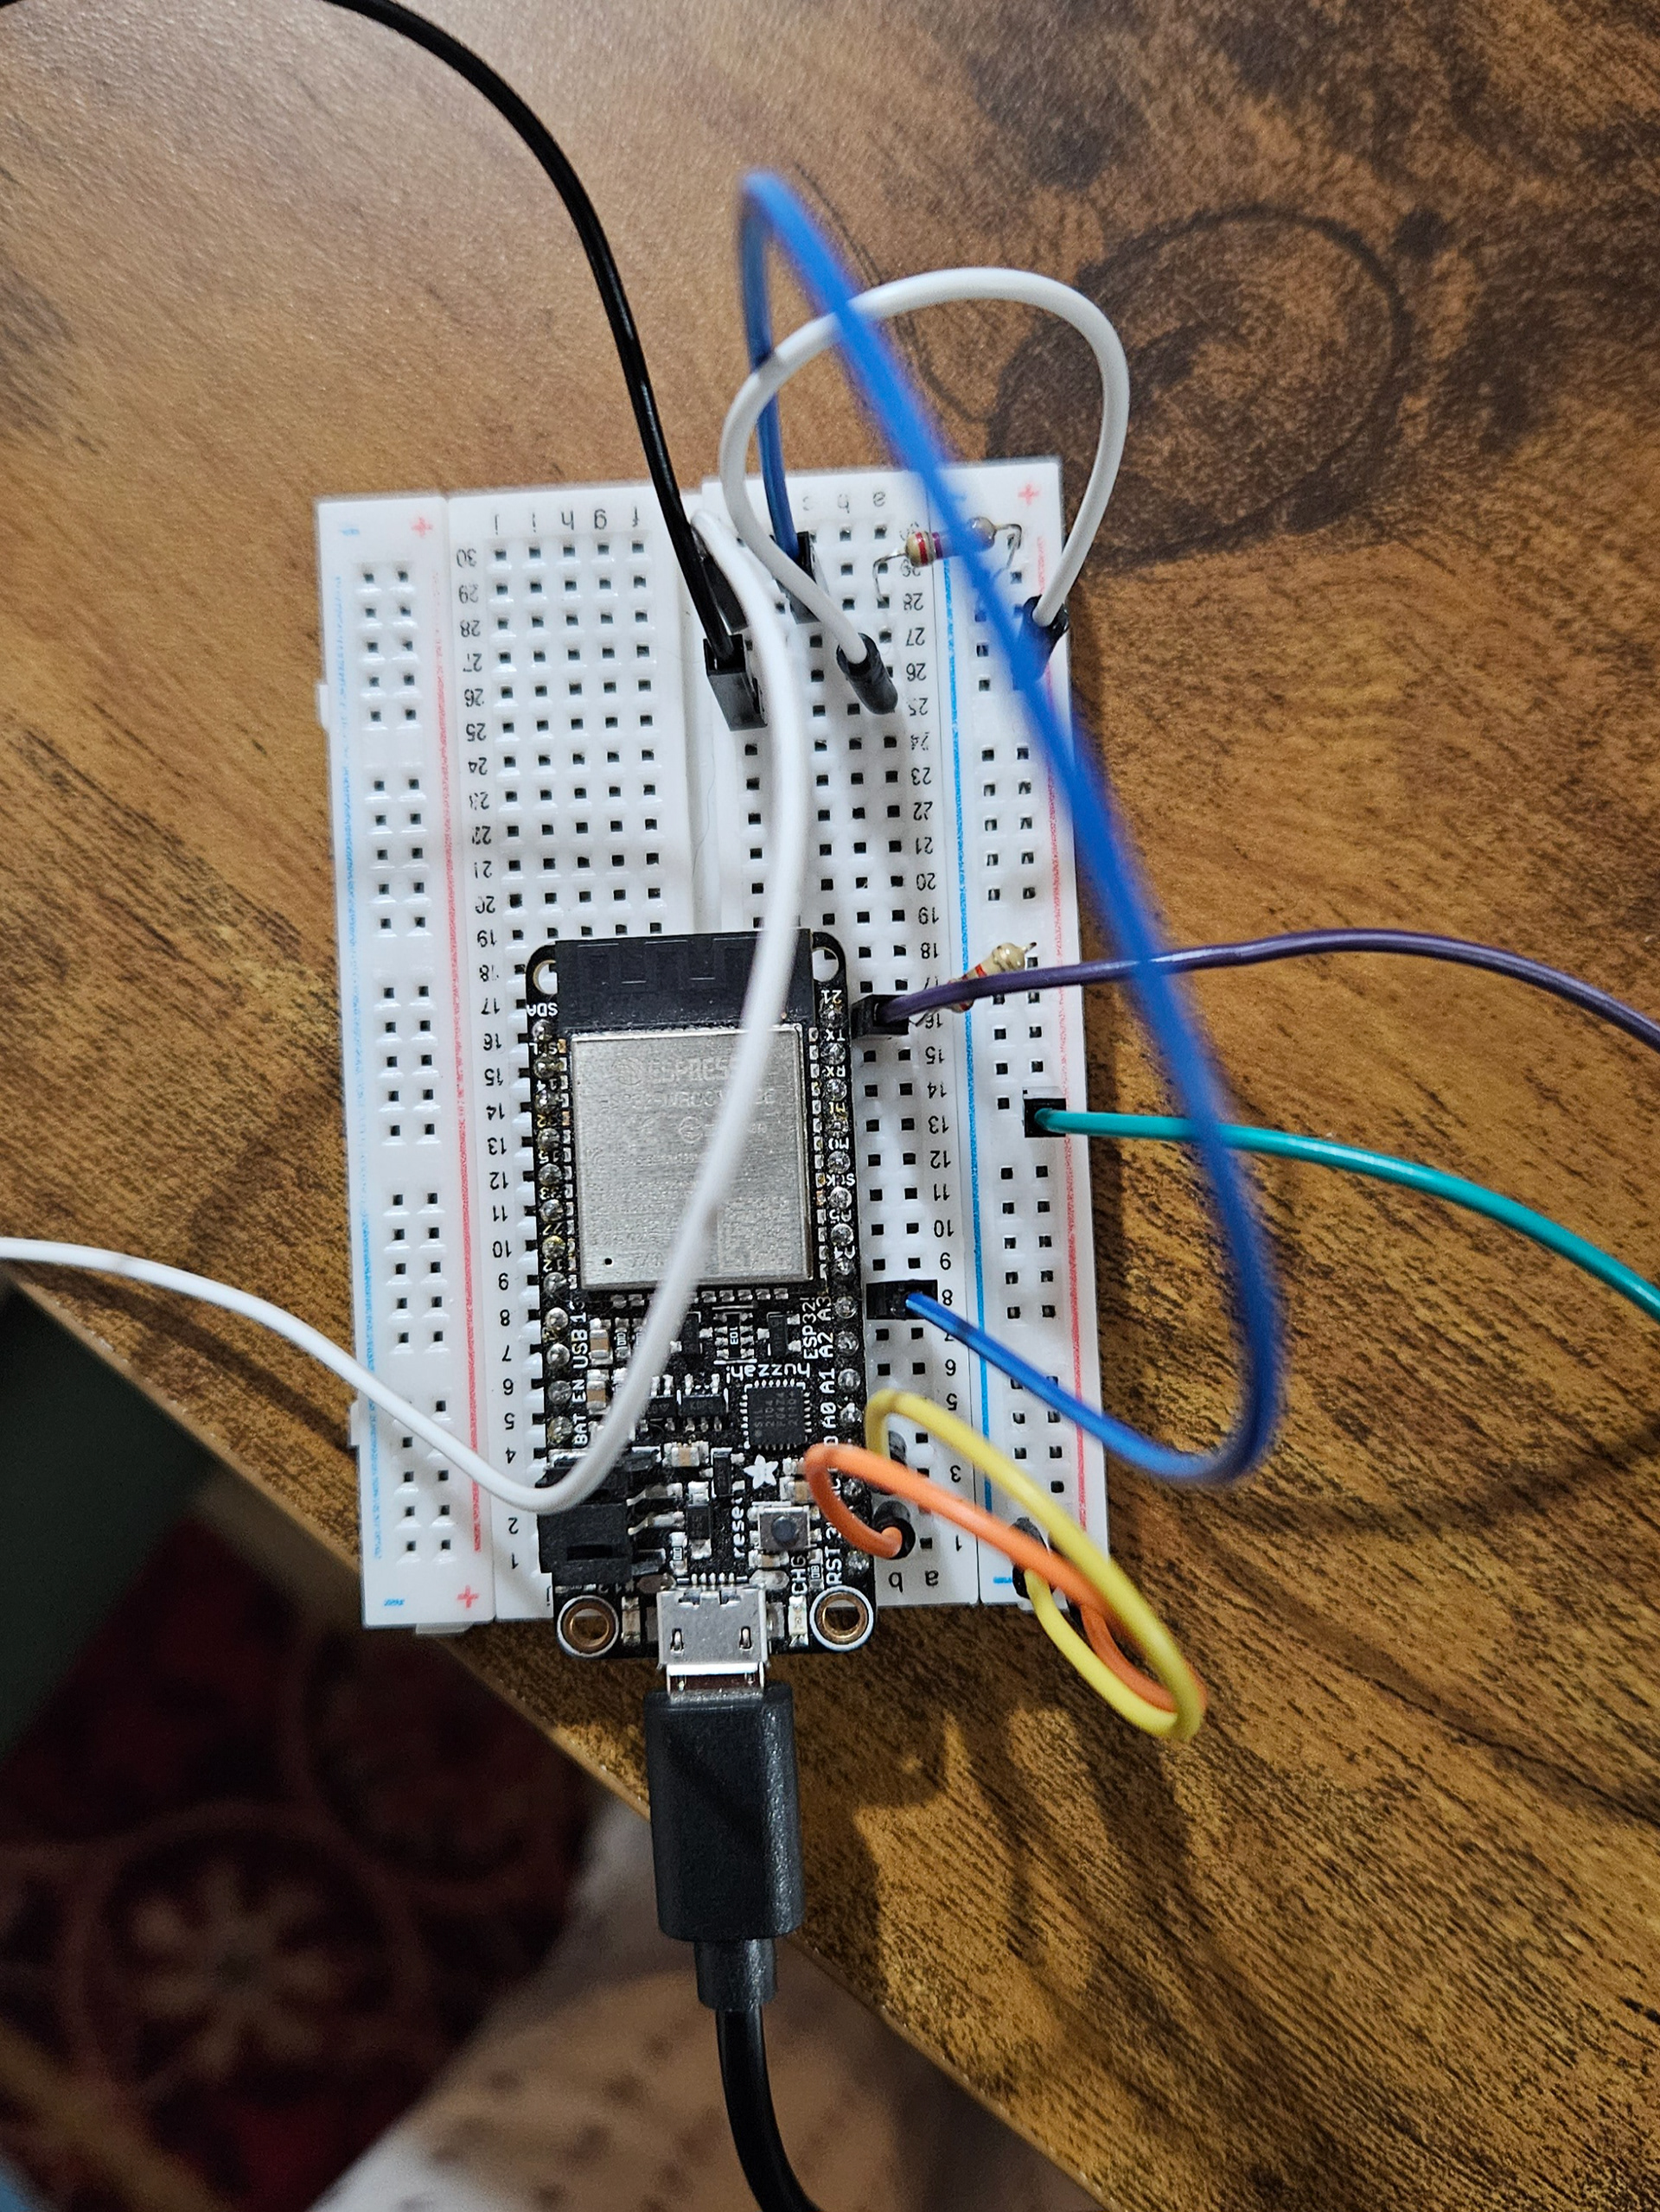
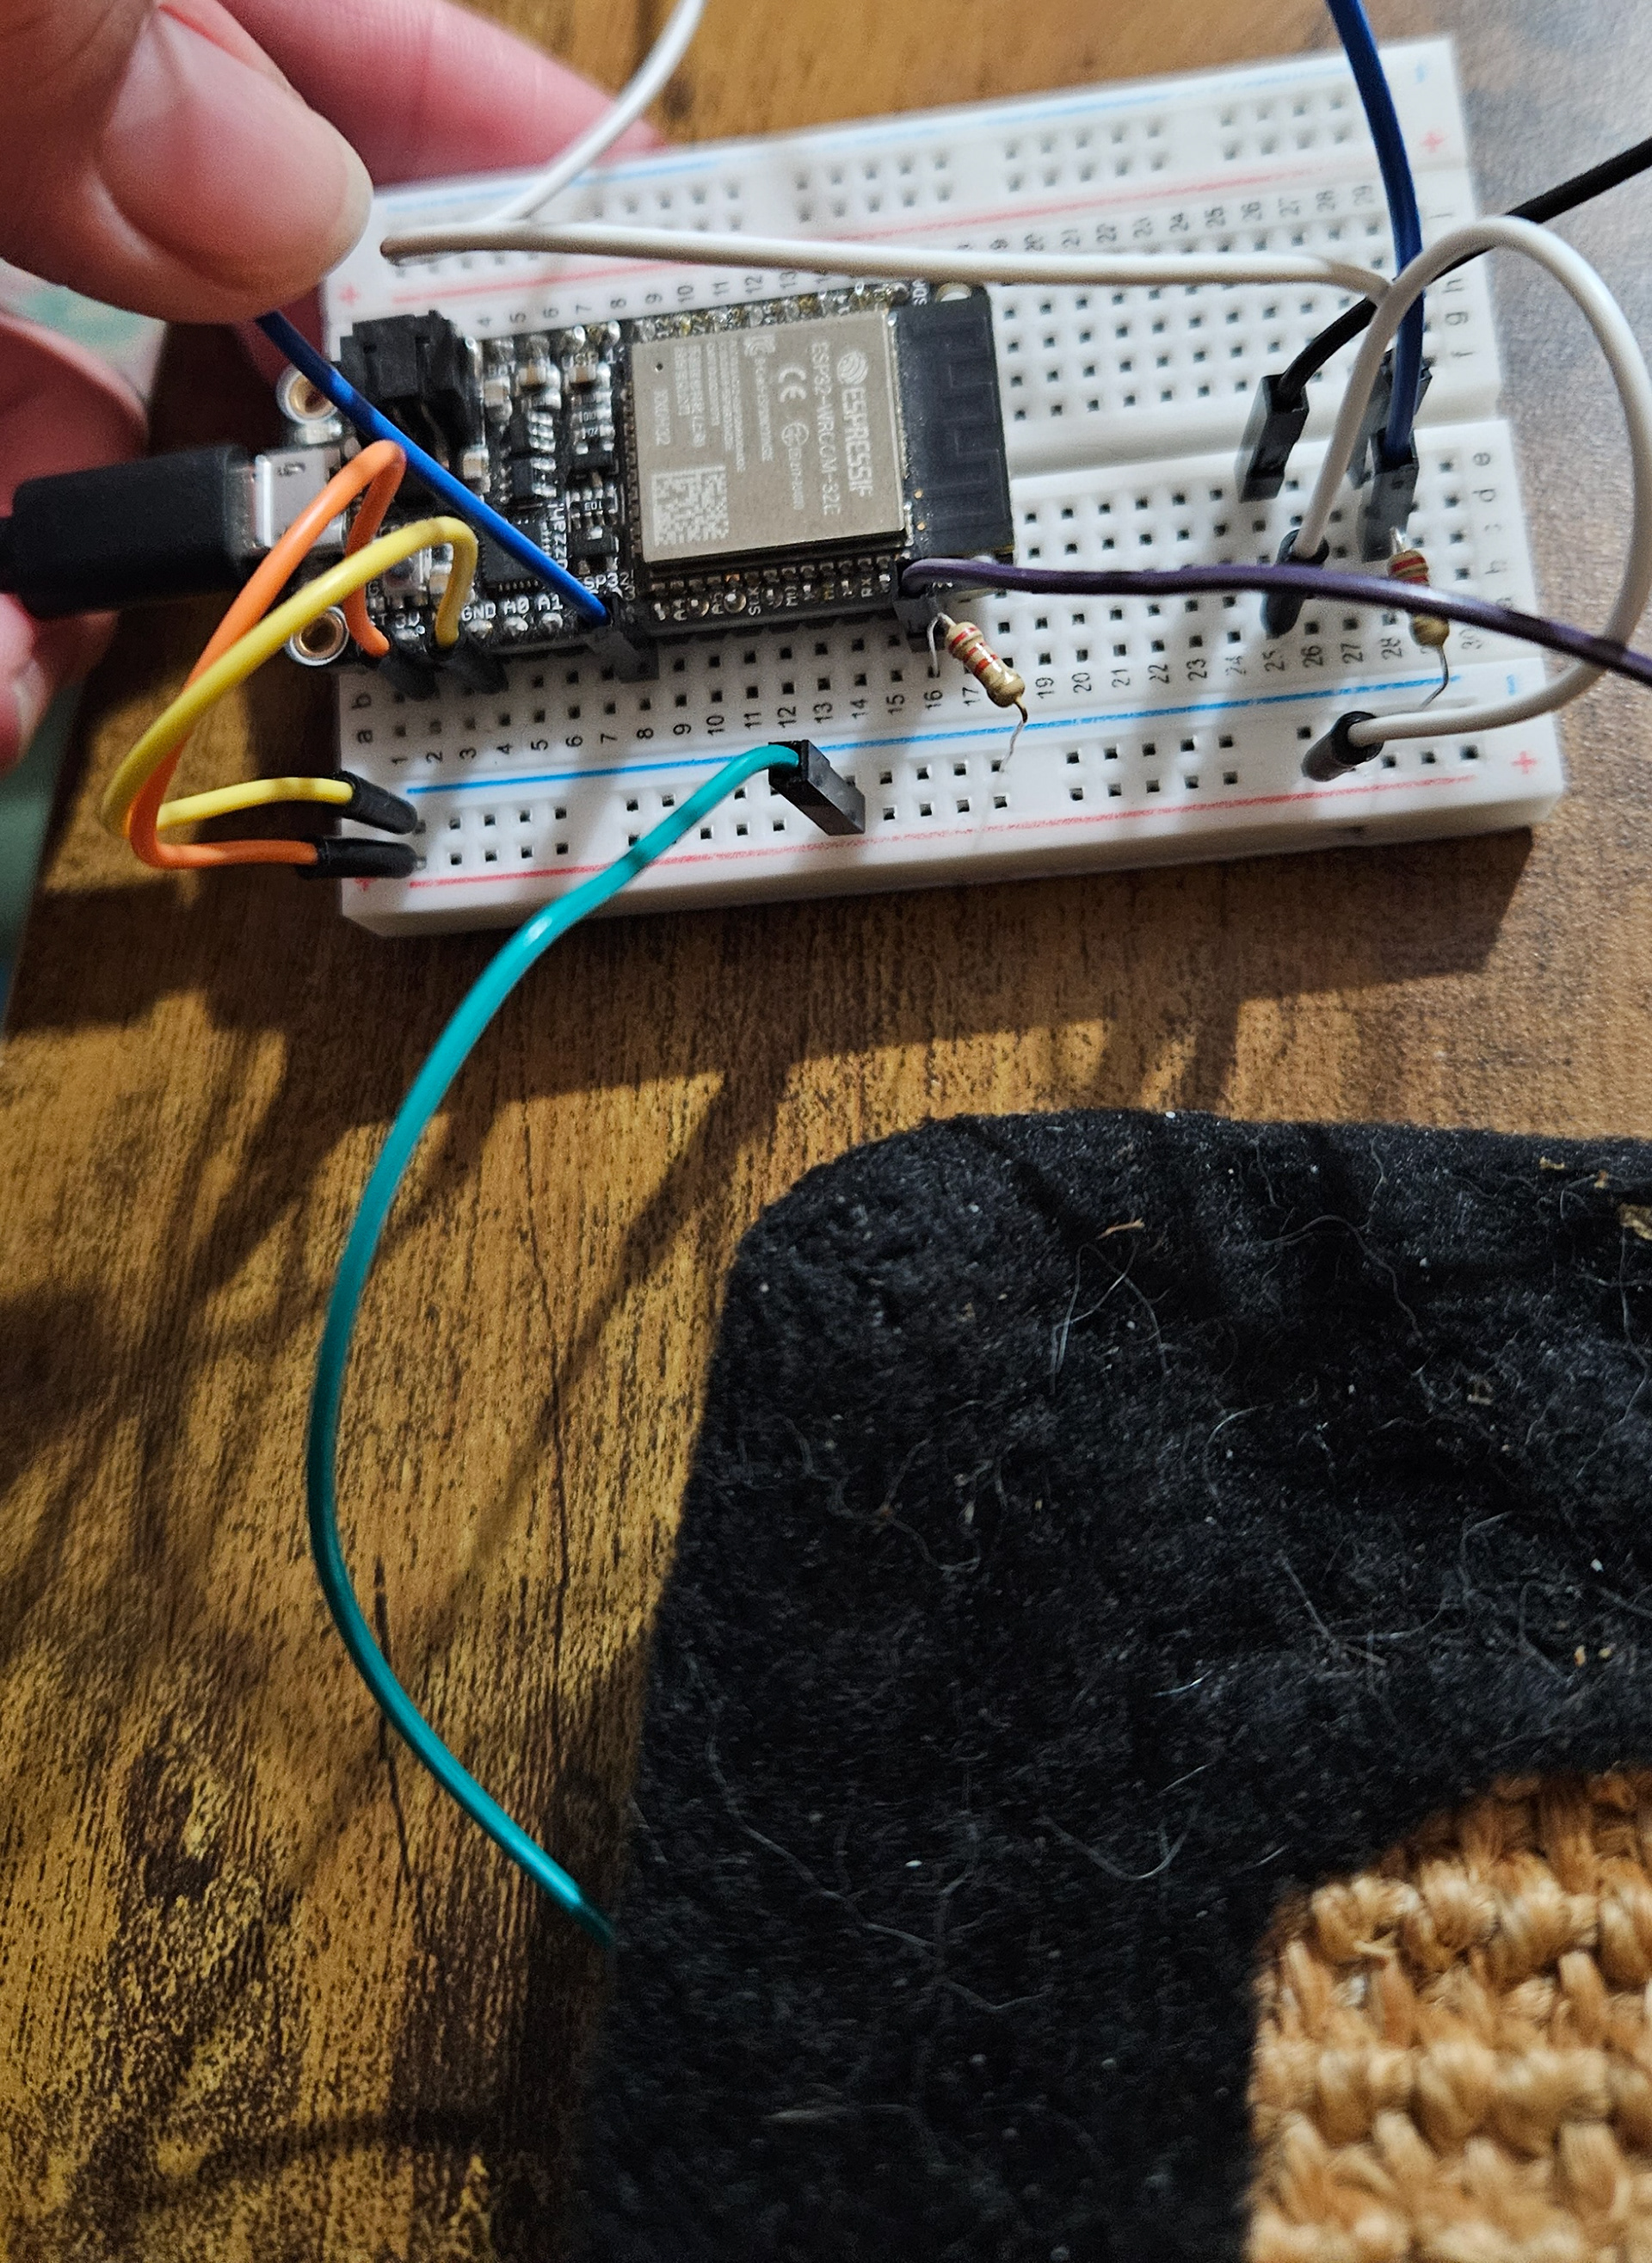
To prevent any potential issues, I extended the button's cable and secured it to the table with tape. I then placed a cardboard food mat over the button, which allows for data collection regardless of where she sits or steps on her mat. This way, I can maintain the integrity of the setup while keeping Oktober safe and curious.
Arduino, We Have A Problem
Before I moved anything around, I made sure to test my board to confirm that it was still collecting data. That's when things started to get weird!
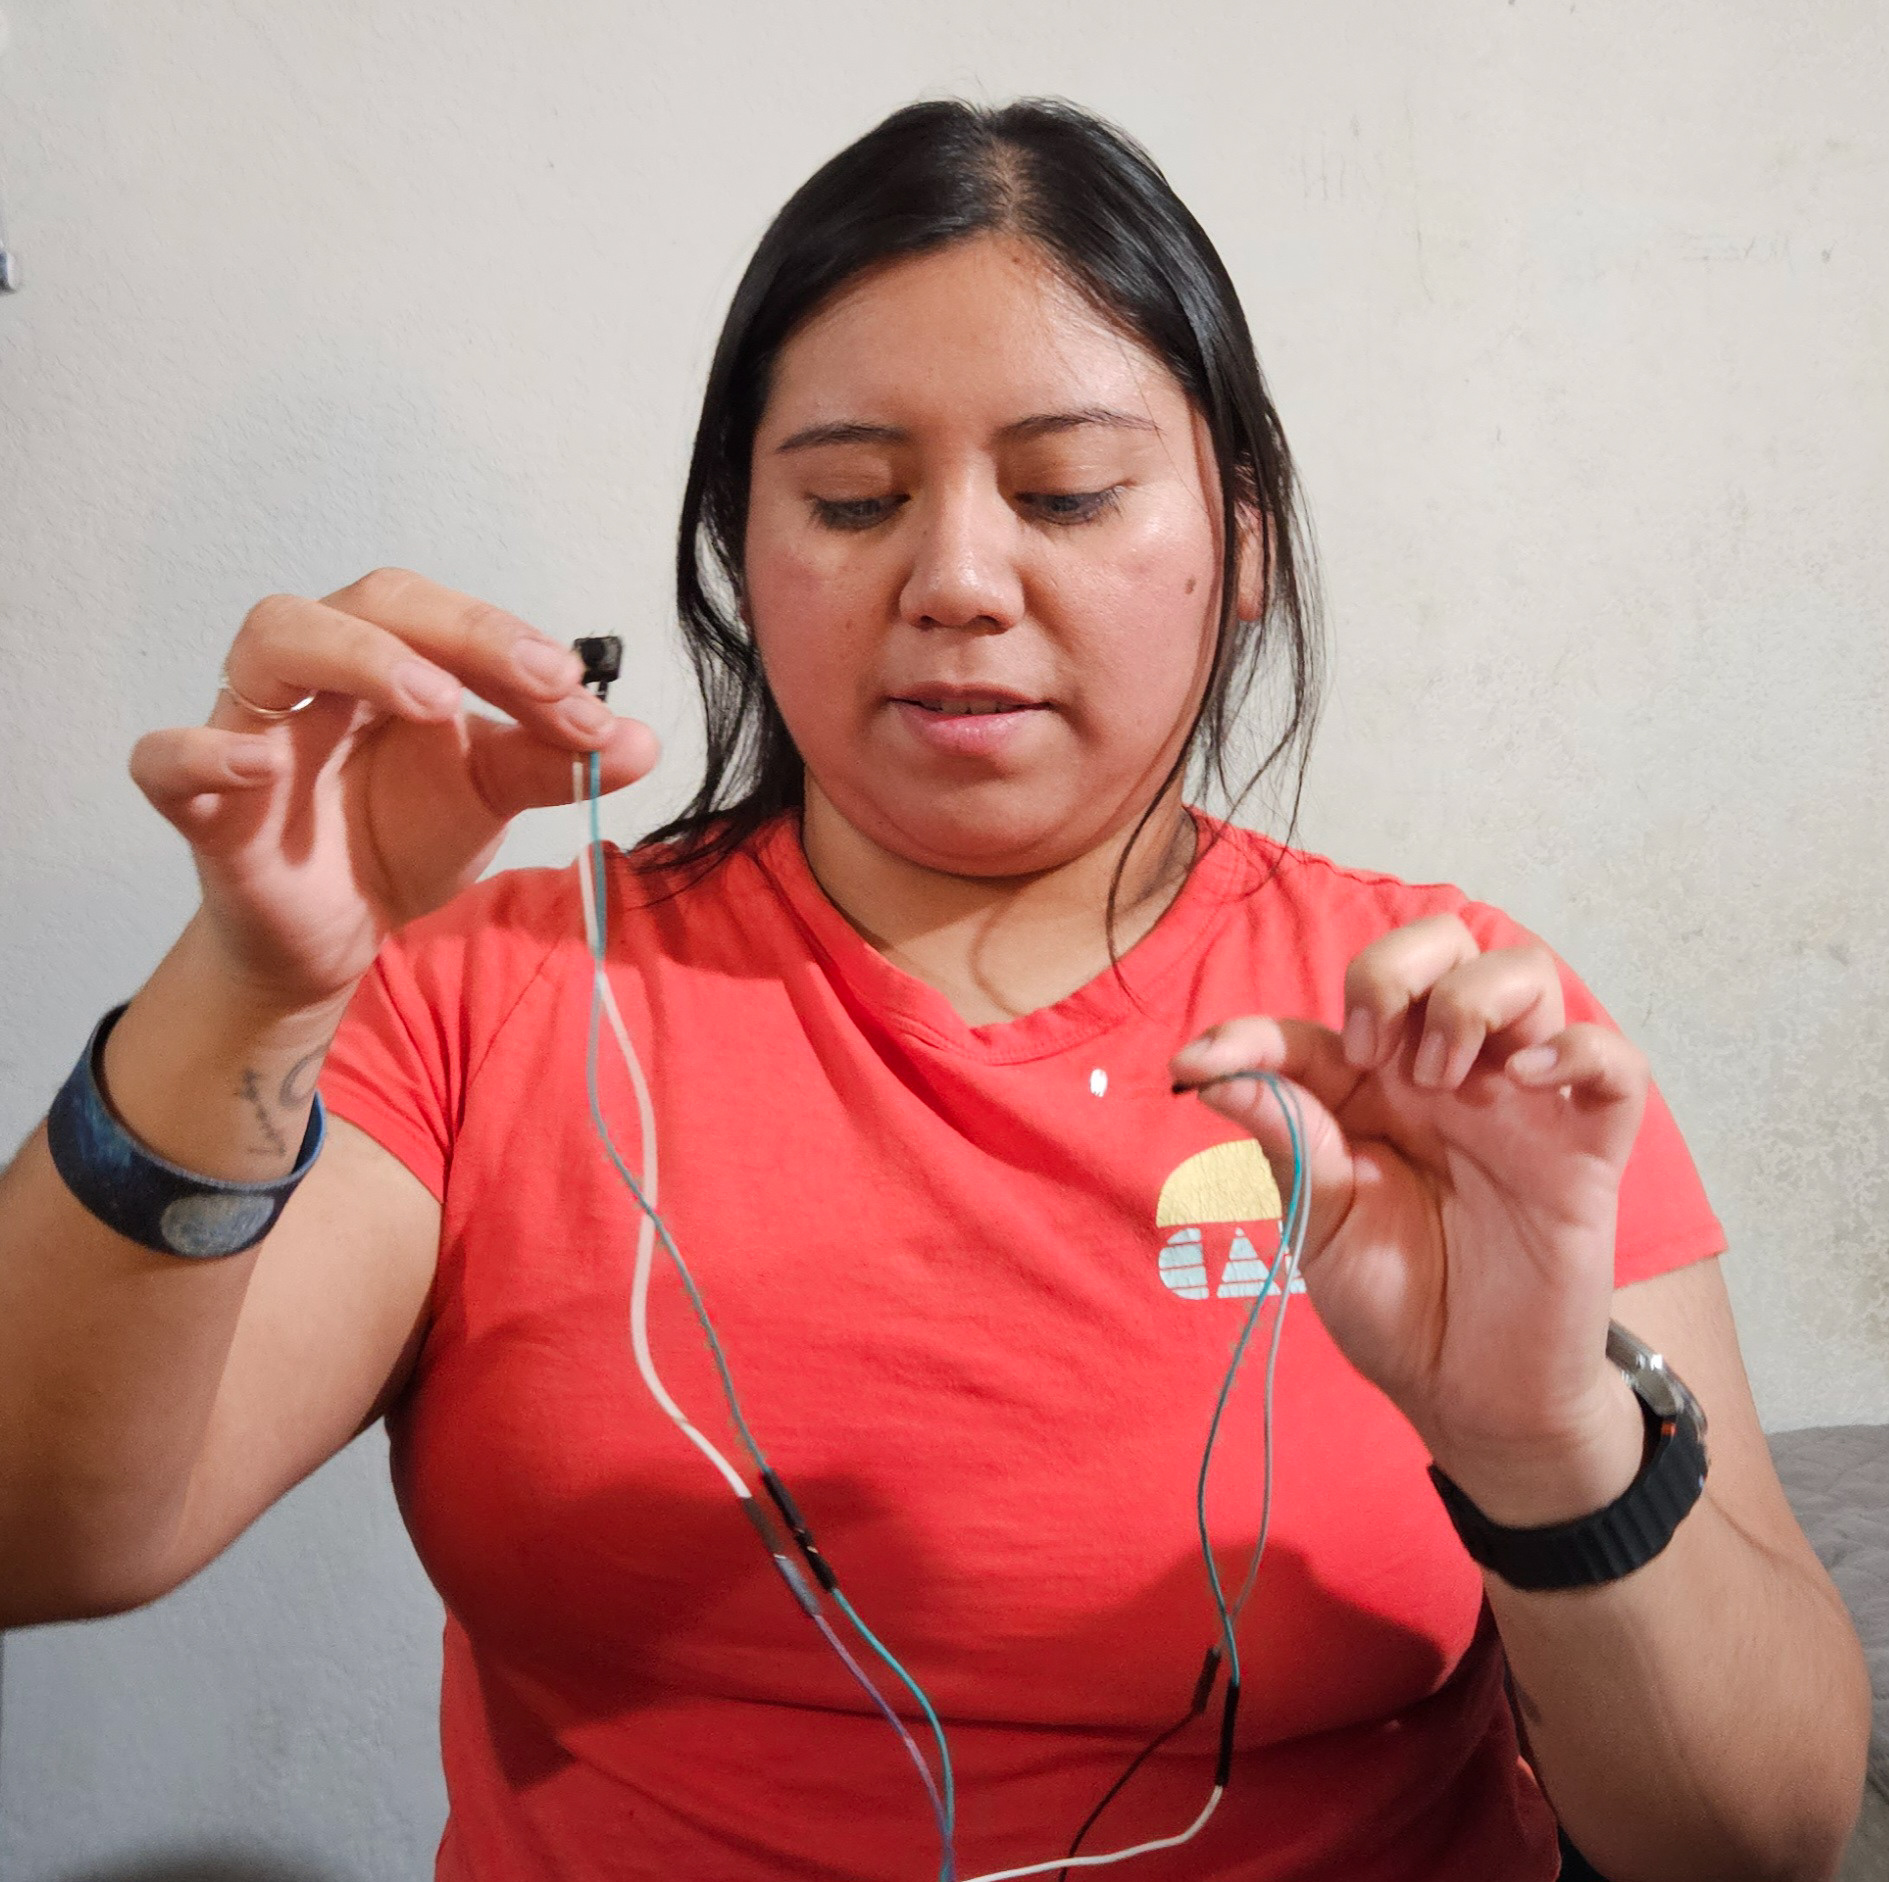
Pressing the button or shining a bright light on the photocell should have gathered data, but nothing happened. When I plugged in my board to configure it, I noticed that the port kept connecting and disconnecting while the code was uploading. To ensure I didn't damage my board, I removed everything and connected each component one by one, testing its connection at every step. The Photocell worked, but not my button.
Although I tend to exhaust the online resources first before turning to my professor, I immediately knew that I was not comfortable problem-solving this issue alone, and I'm okay with acknowledging that. At the end of the day, I'm still learning this side of tangible interactions and I enjoy the challenge.
Why are you not working?
Yay! They work!
Setting Up the Environment
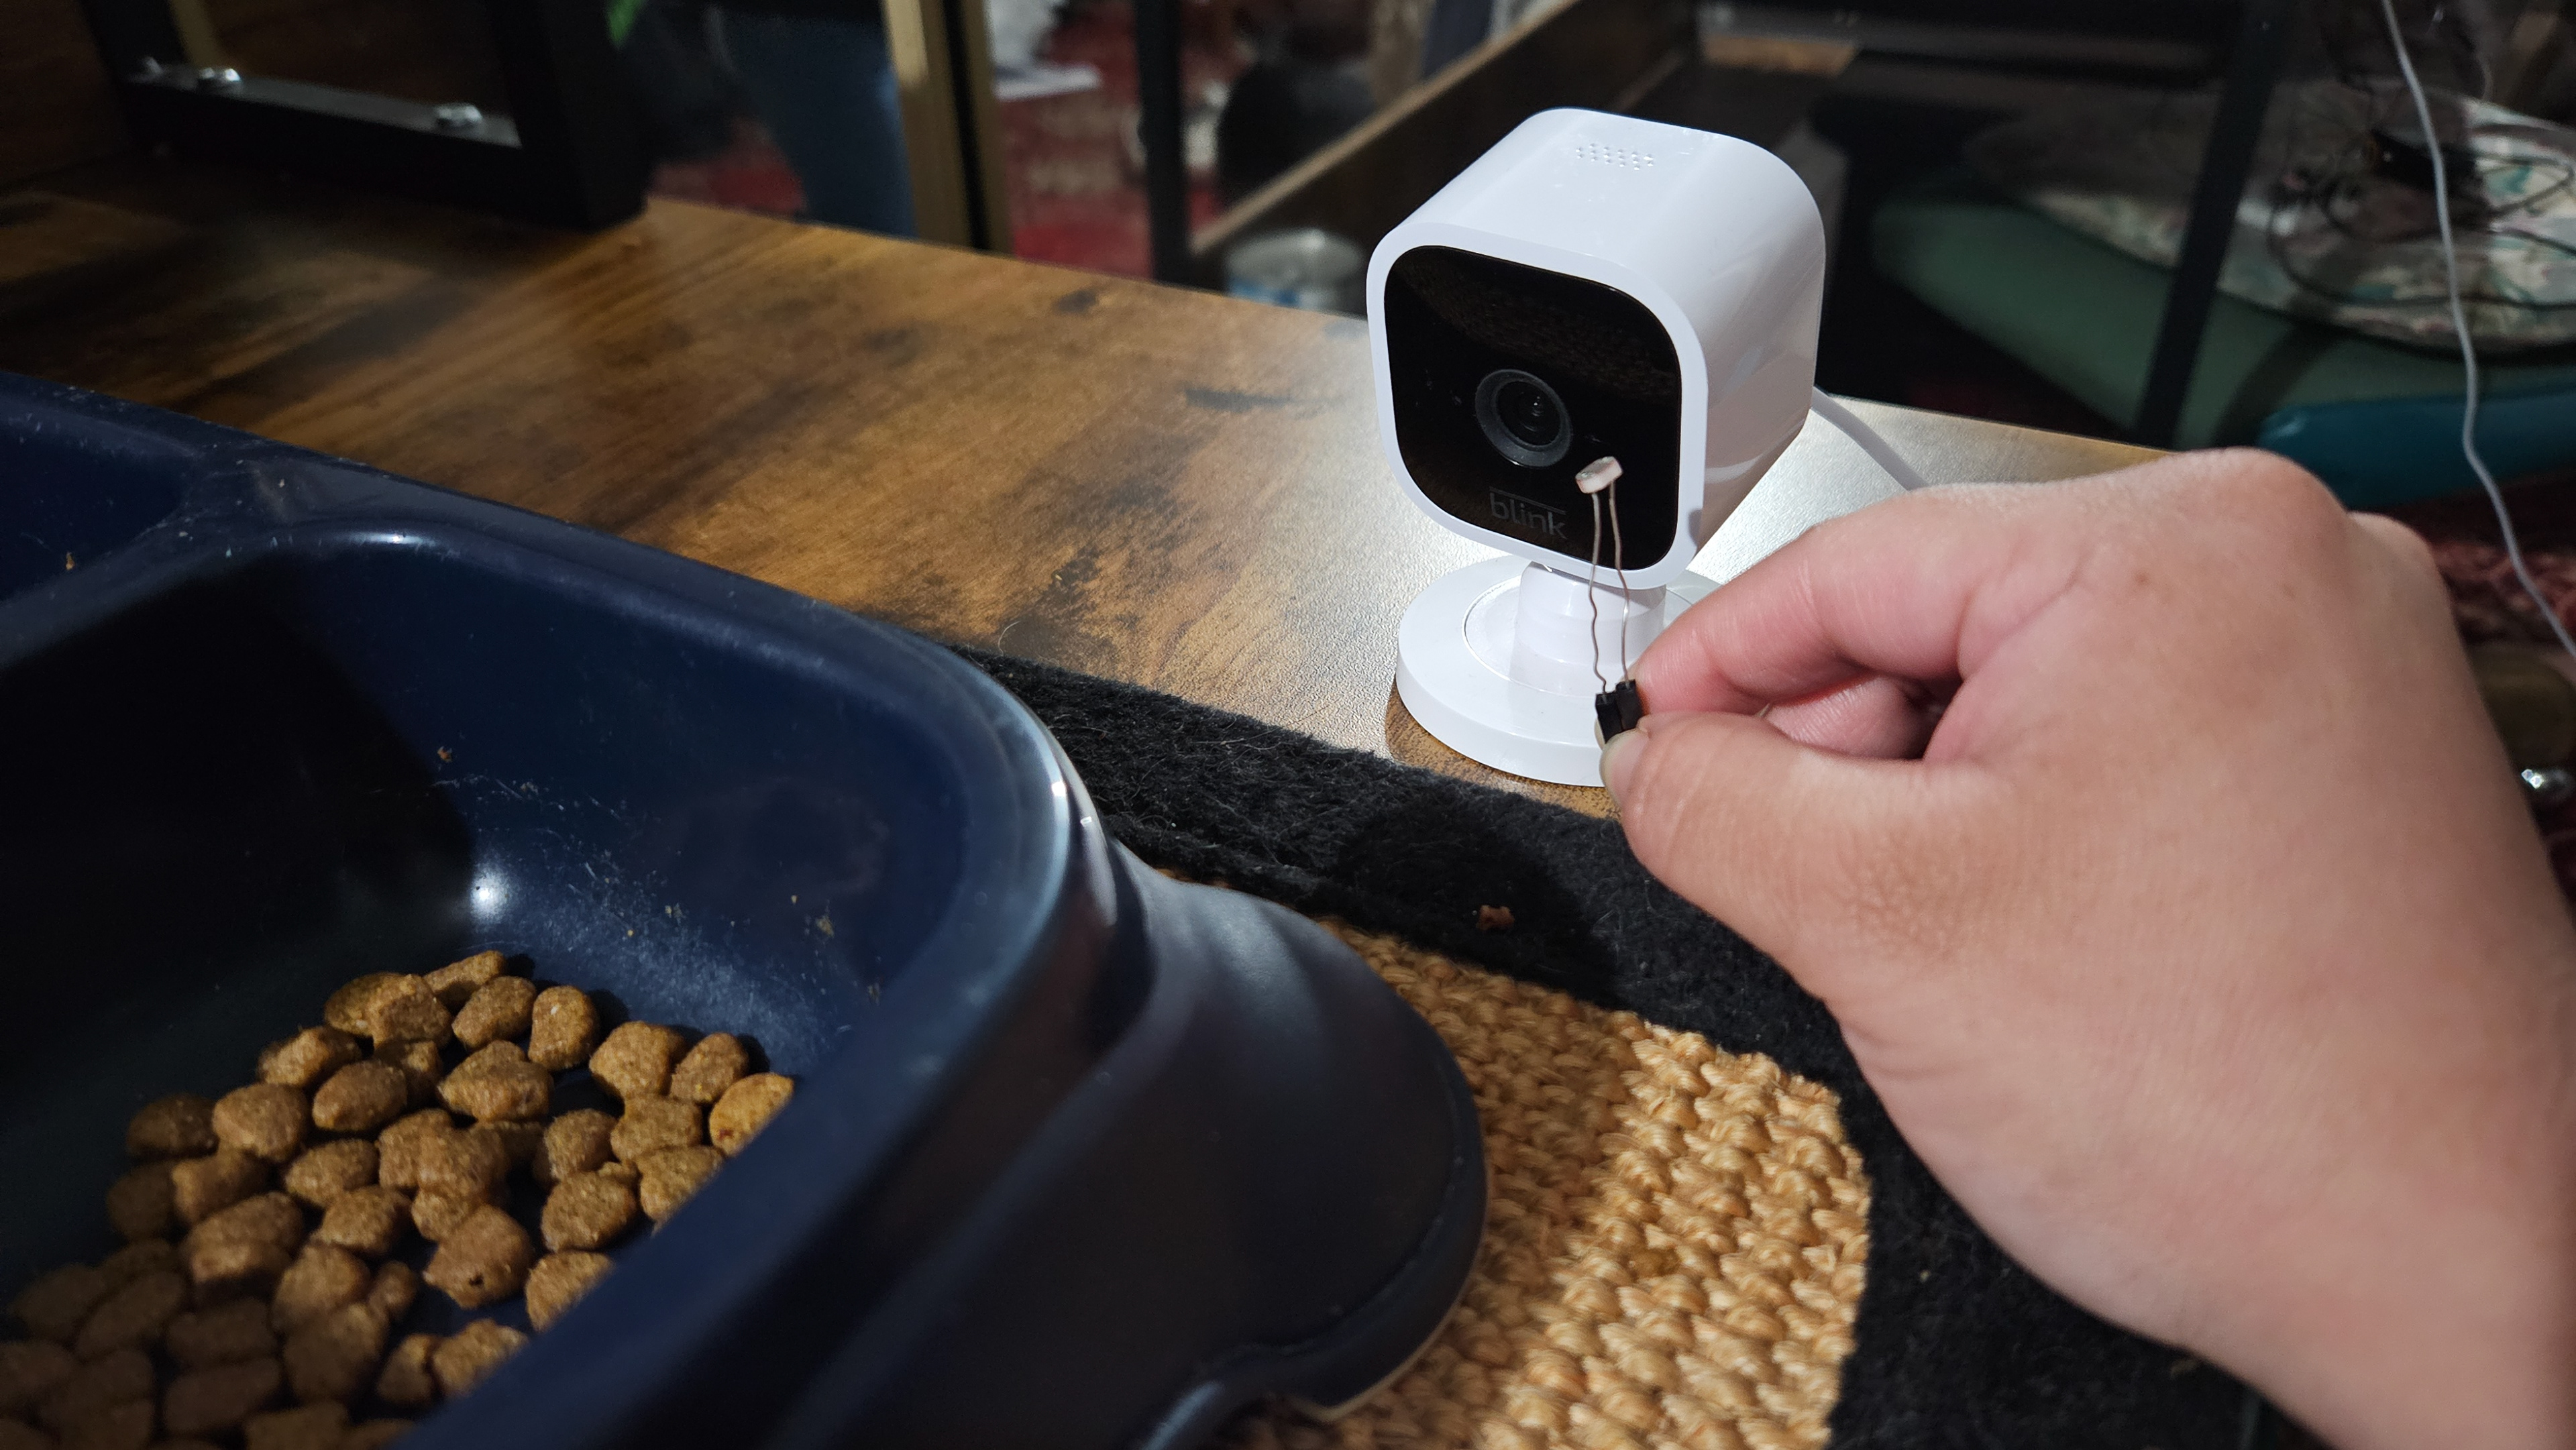
During the day
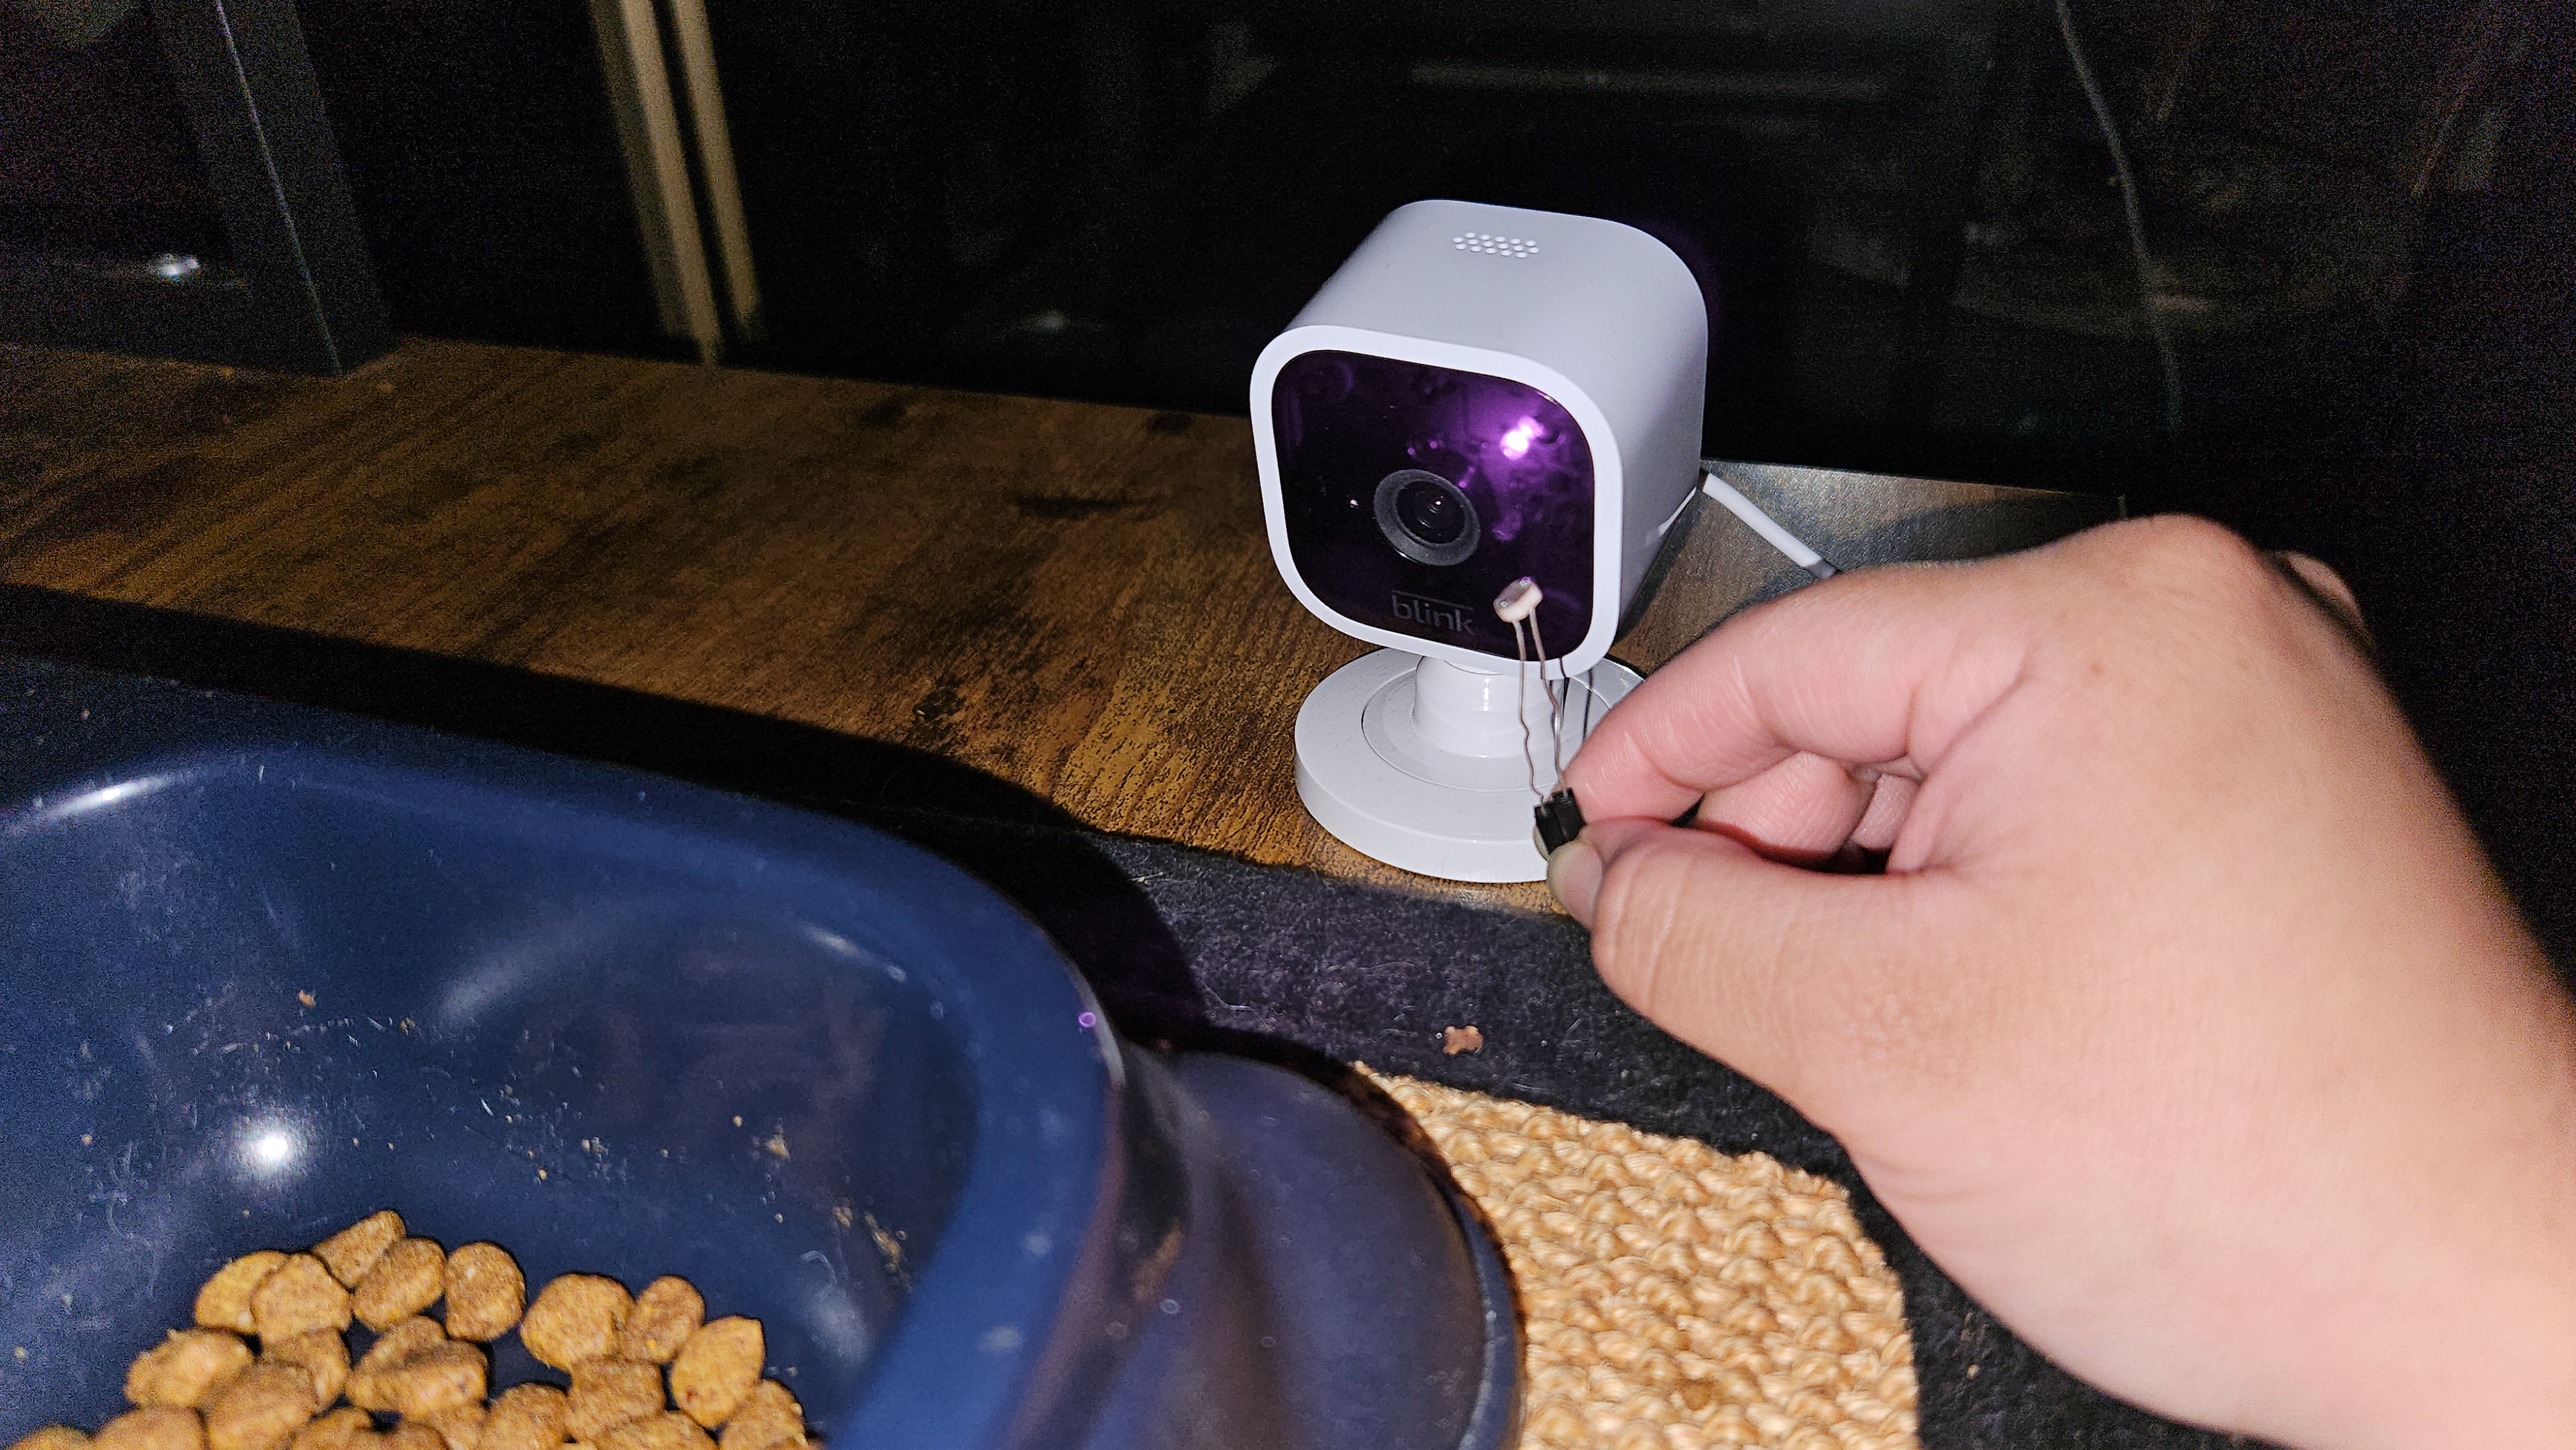
During the night time (picture with flash)
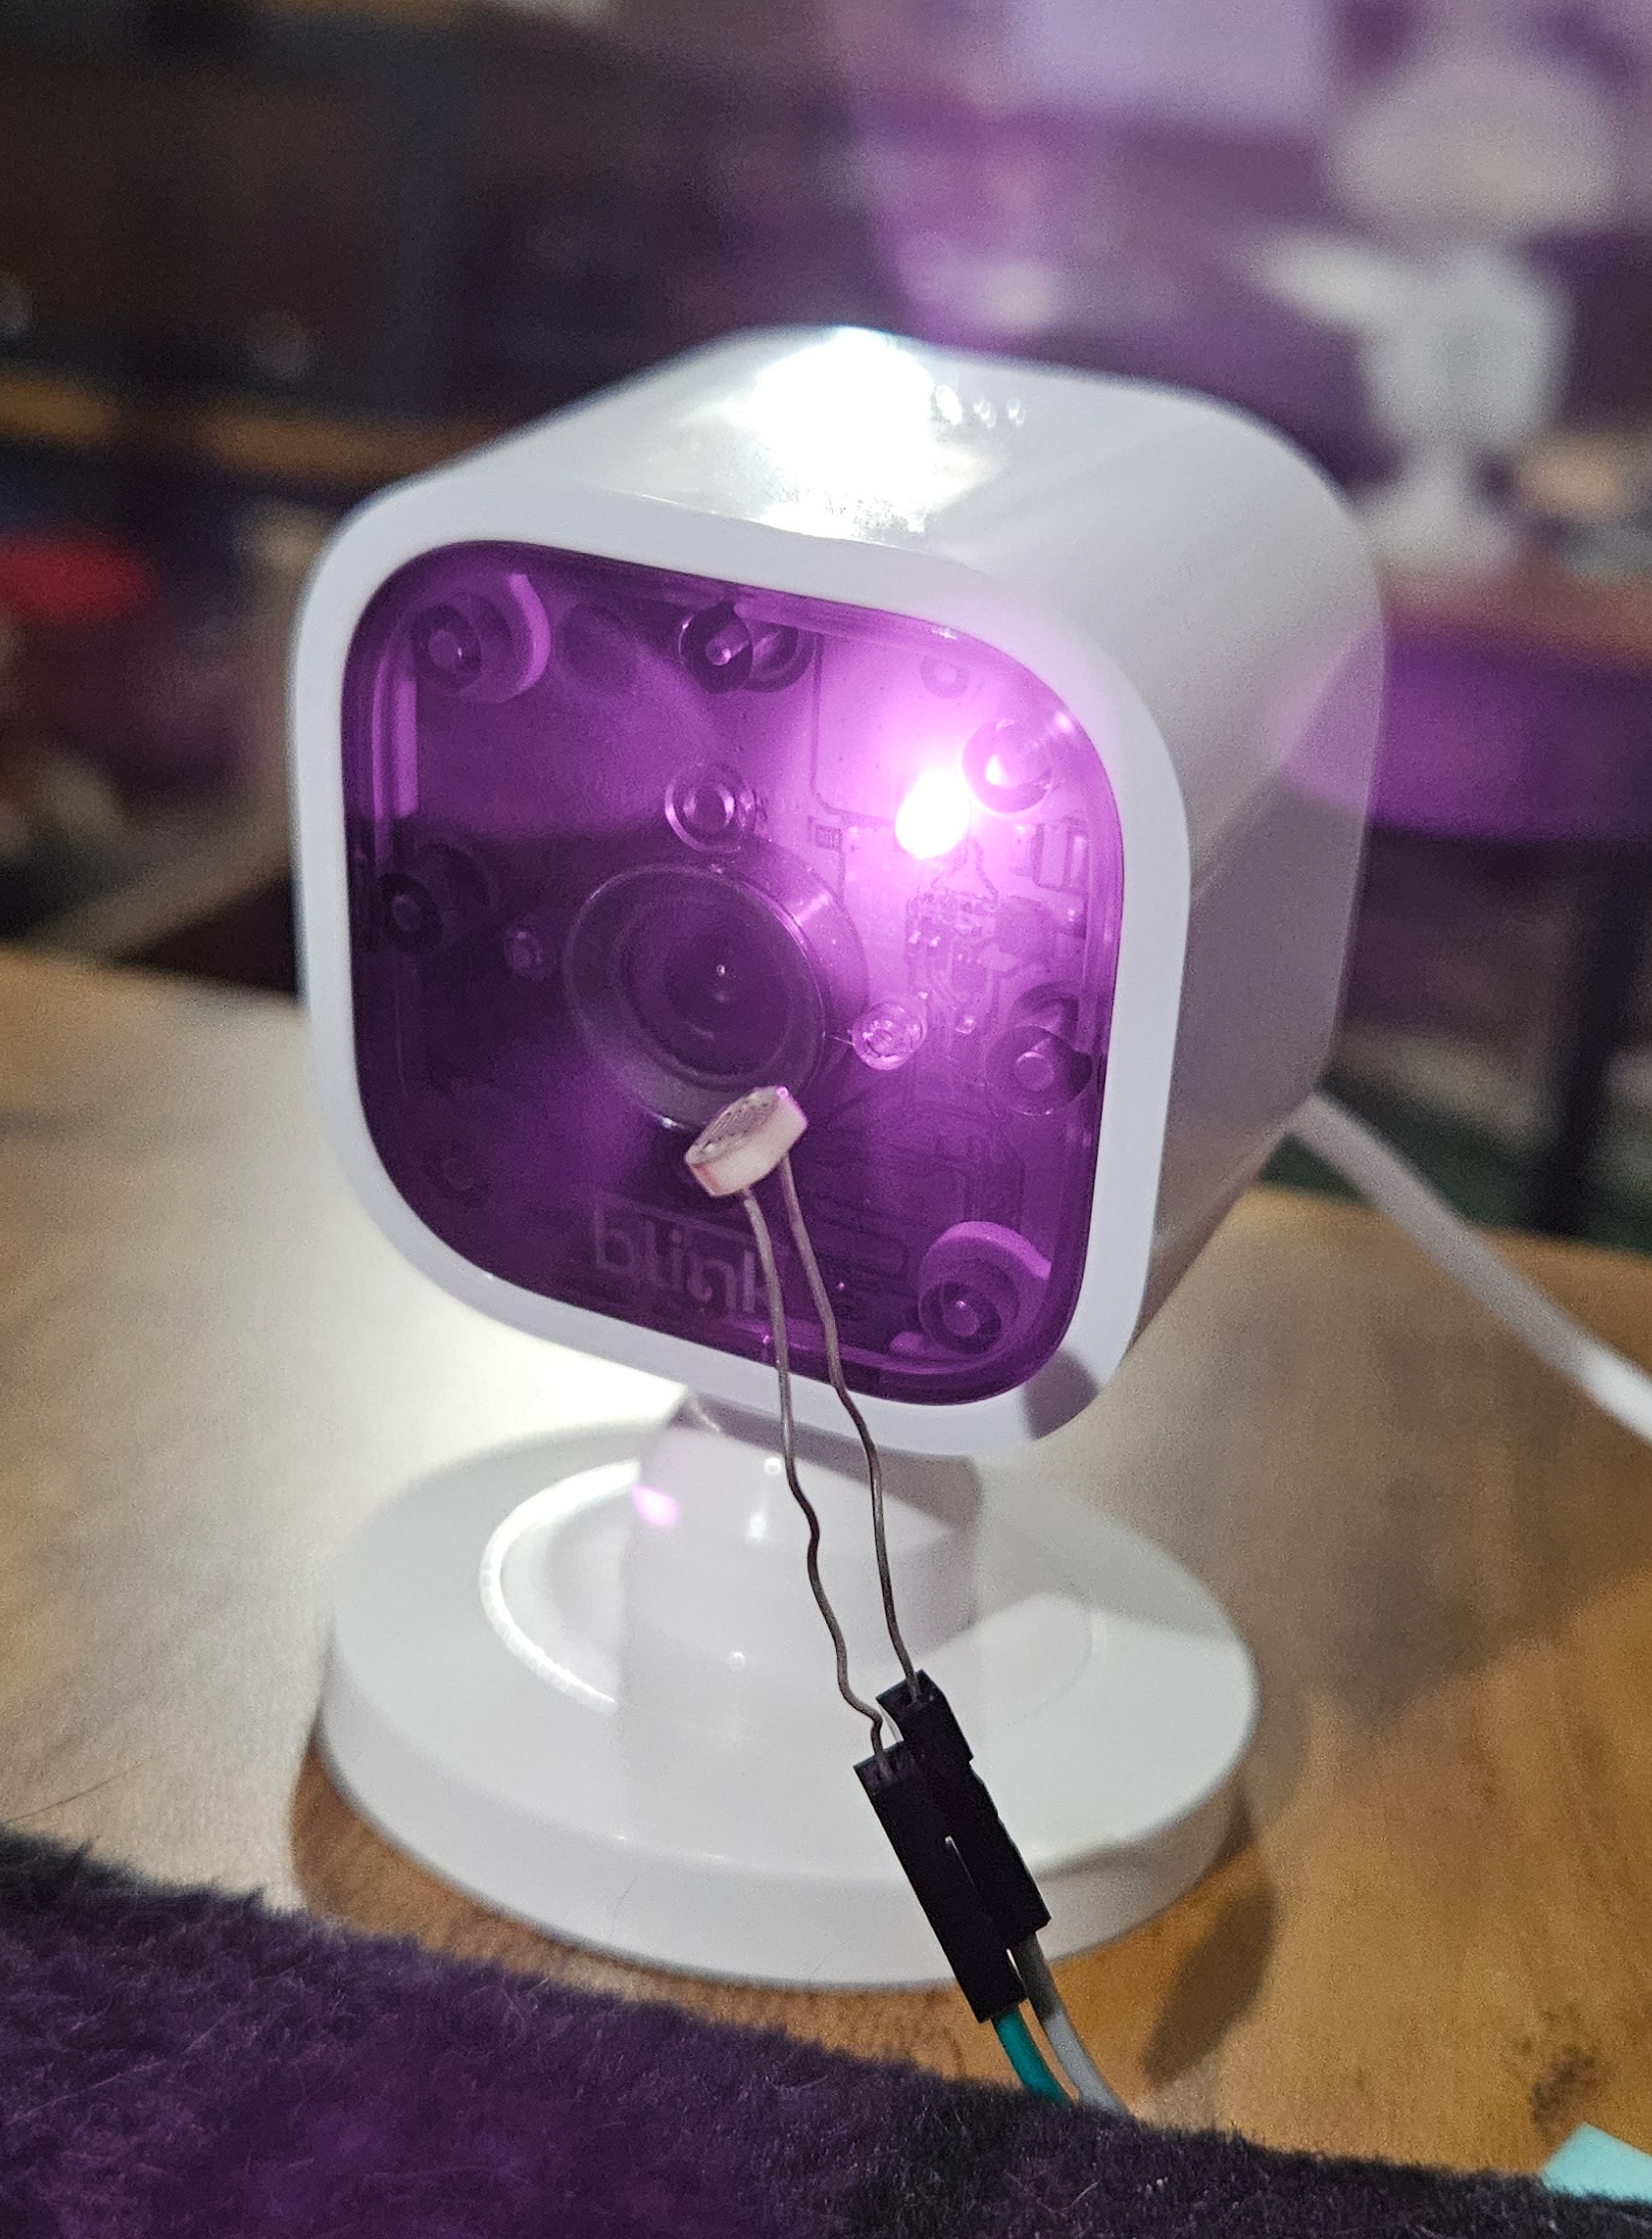
Close-up of photocell and camera
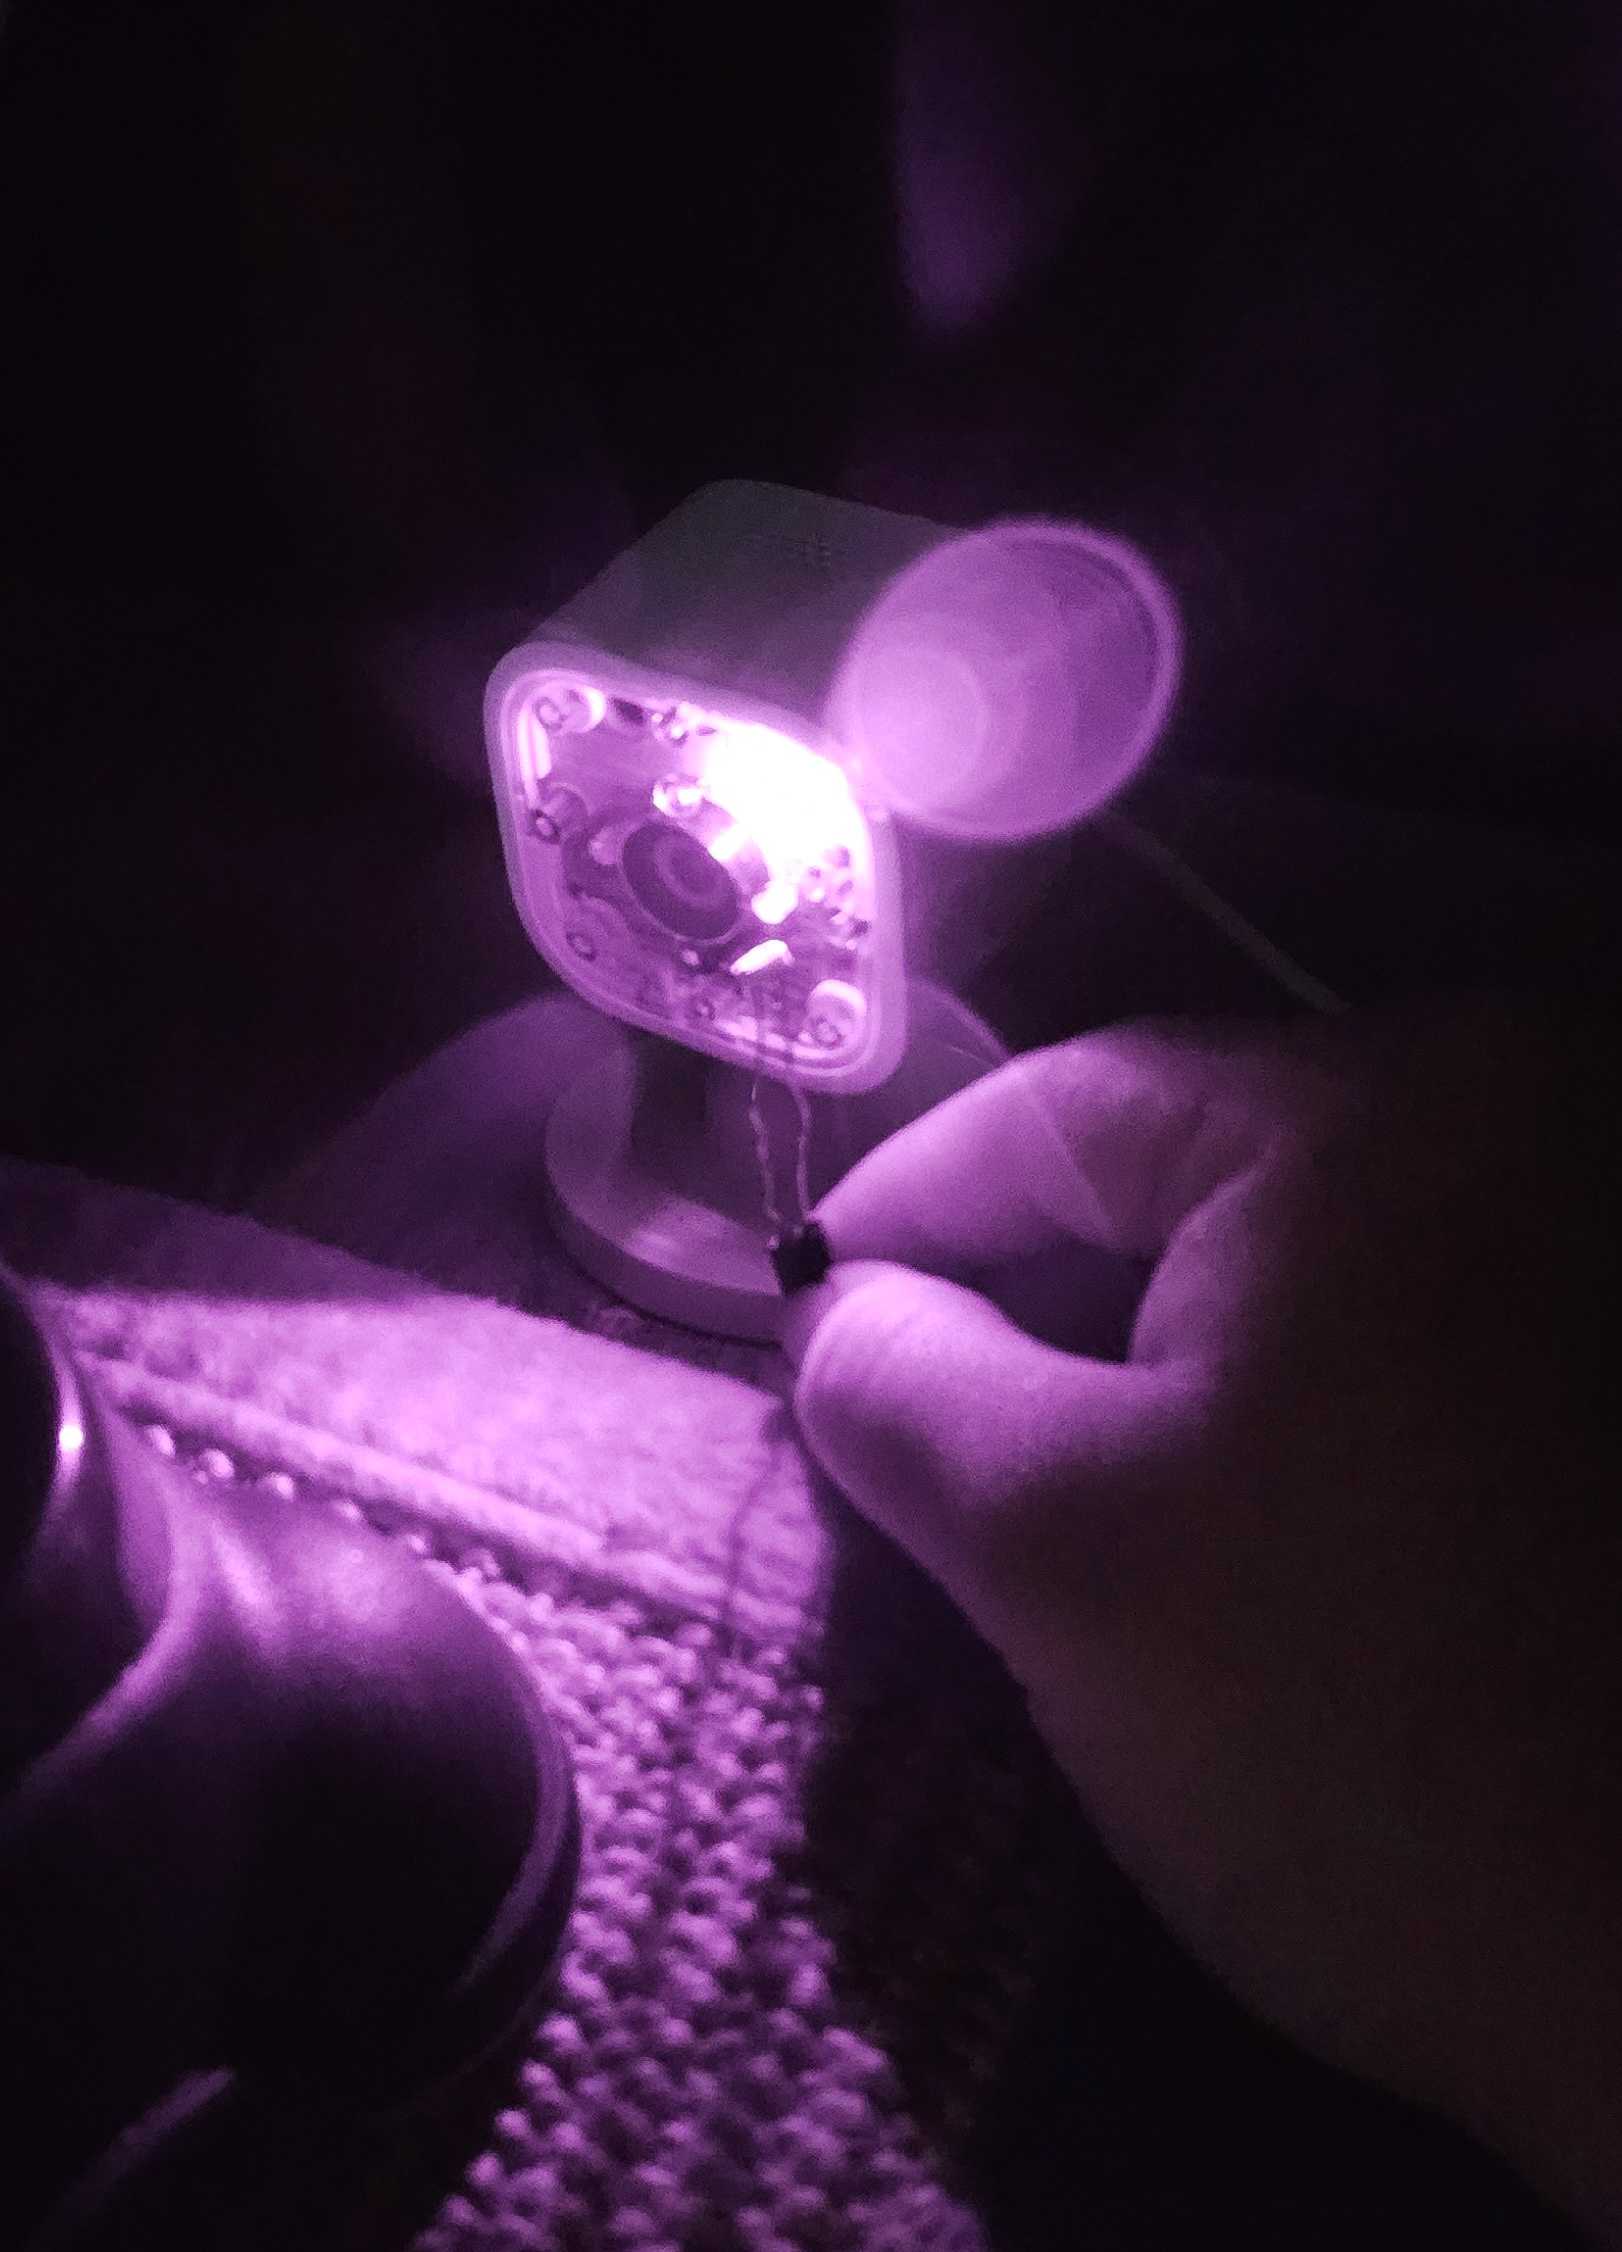
photocell receiving information at night
Since the photocell needs strong light to receive data, I had to get creative in how to trigger this sensor. What better way than using my Blink camera!
I set up the Blink camera in front of Oktober's bowl, carefully positioning it to ensure the photocell stayed in place overnight and received adequate light from its red LED light. For this project, I adjusted the camera settings so that the red LED light would only turn on when no movement was detected; it would turn off when there was any activity. This approach was deliberate to avoid having a bright light shining on her bowl, especially since I didn't want her to associate the red light with the laser pointer she loves to chase. Ultimately, my goal was to prevent Oktober from making a mess in the middle of the night while collecting data.
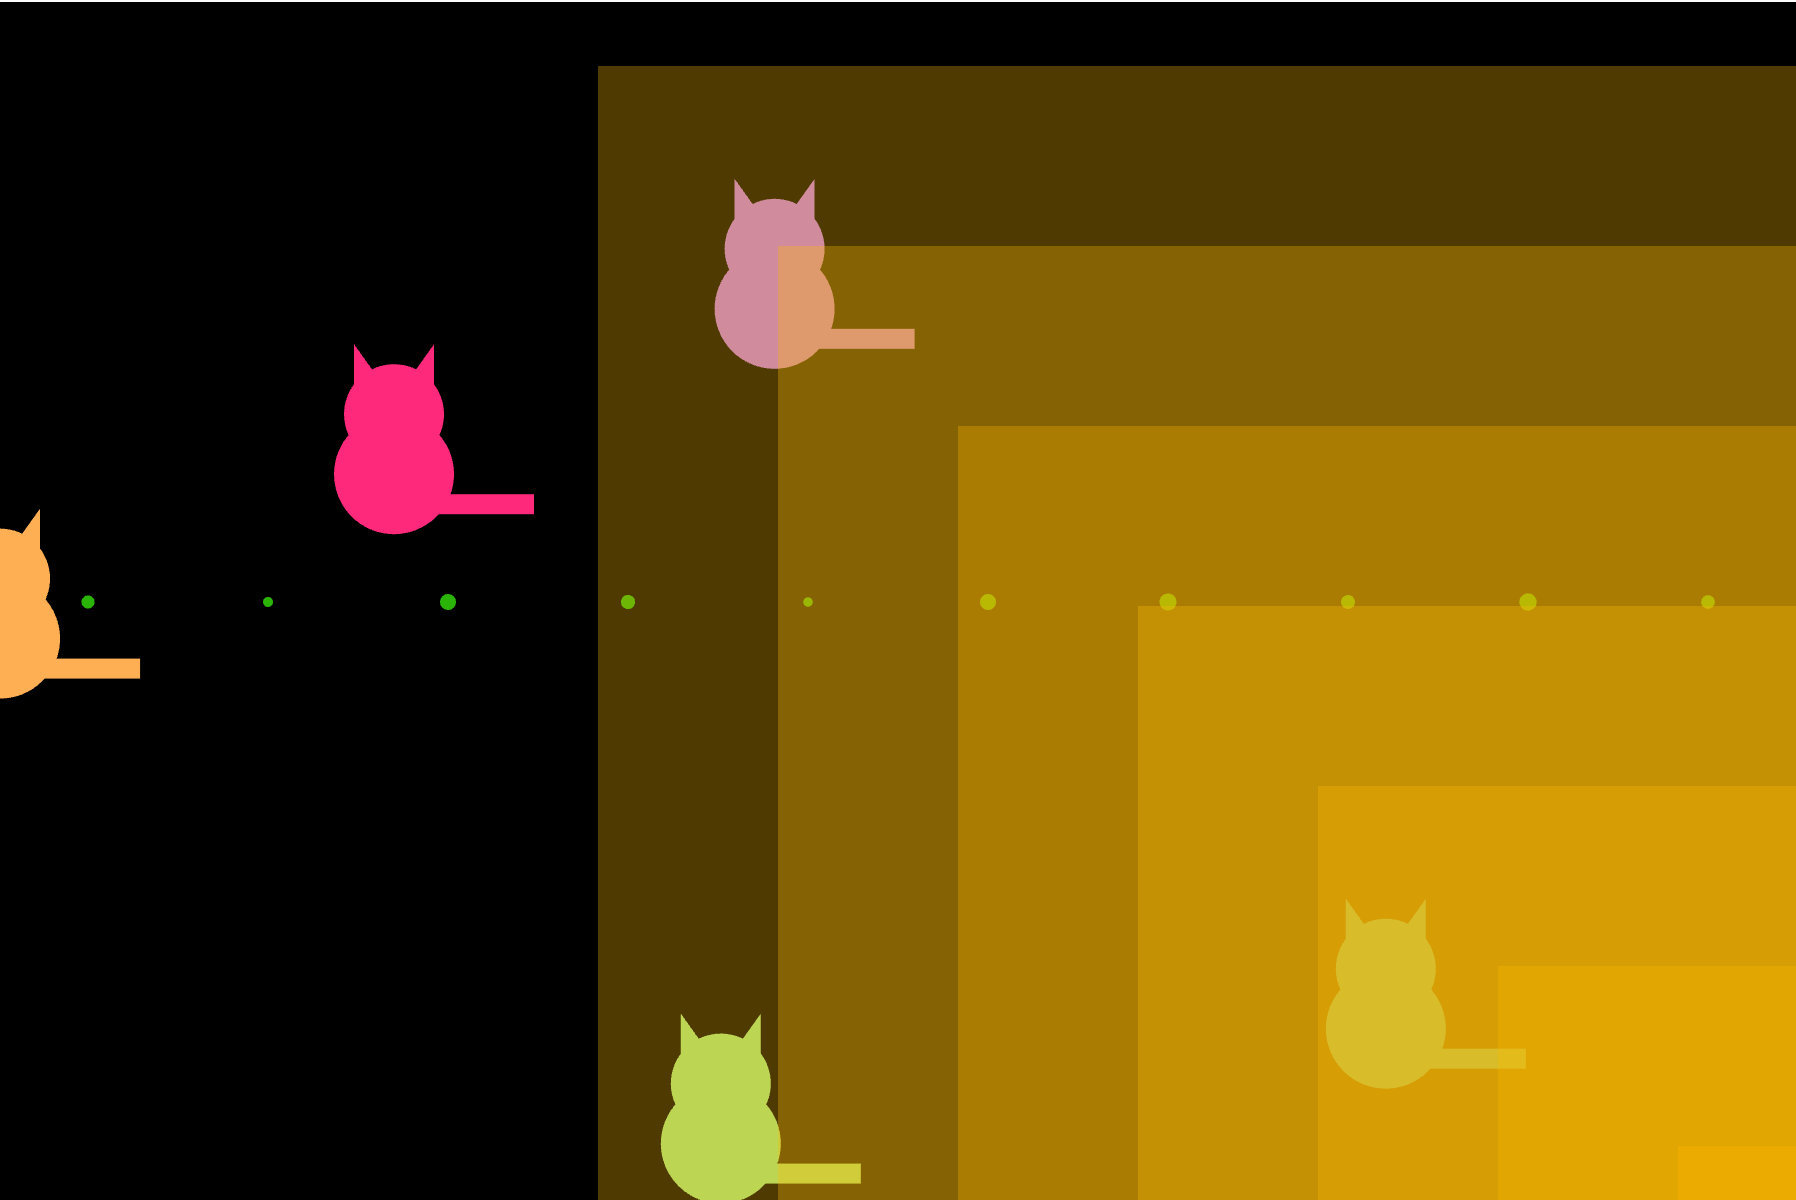
Visually Representing Oktober
With my professor's help, we examined the board and discovered that a piece of my code was missing!
Although I enjoy solving puzzles, I recognize my limitations. I am very grateful that I asked for help instead of becoming overwhelmed and giving up. During this challenging phase of the project, I asked my professor to guide me through what was missing and to set up my board for testing in class. This support helped me move forward into the next part—creating the visual representations!
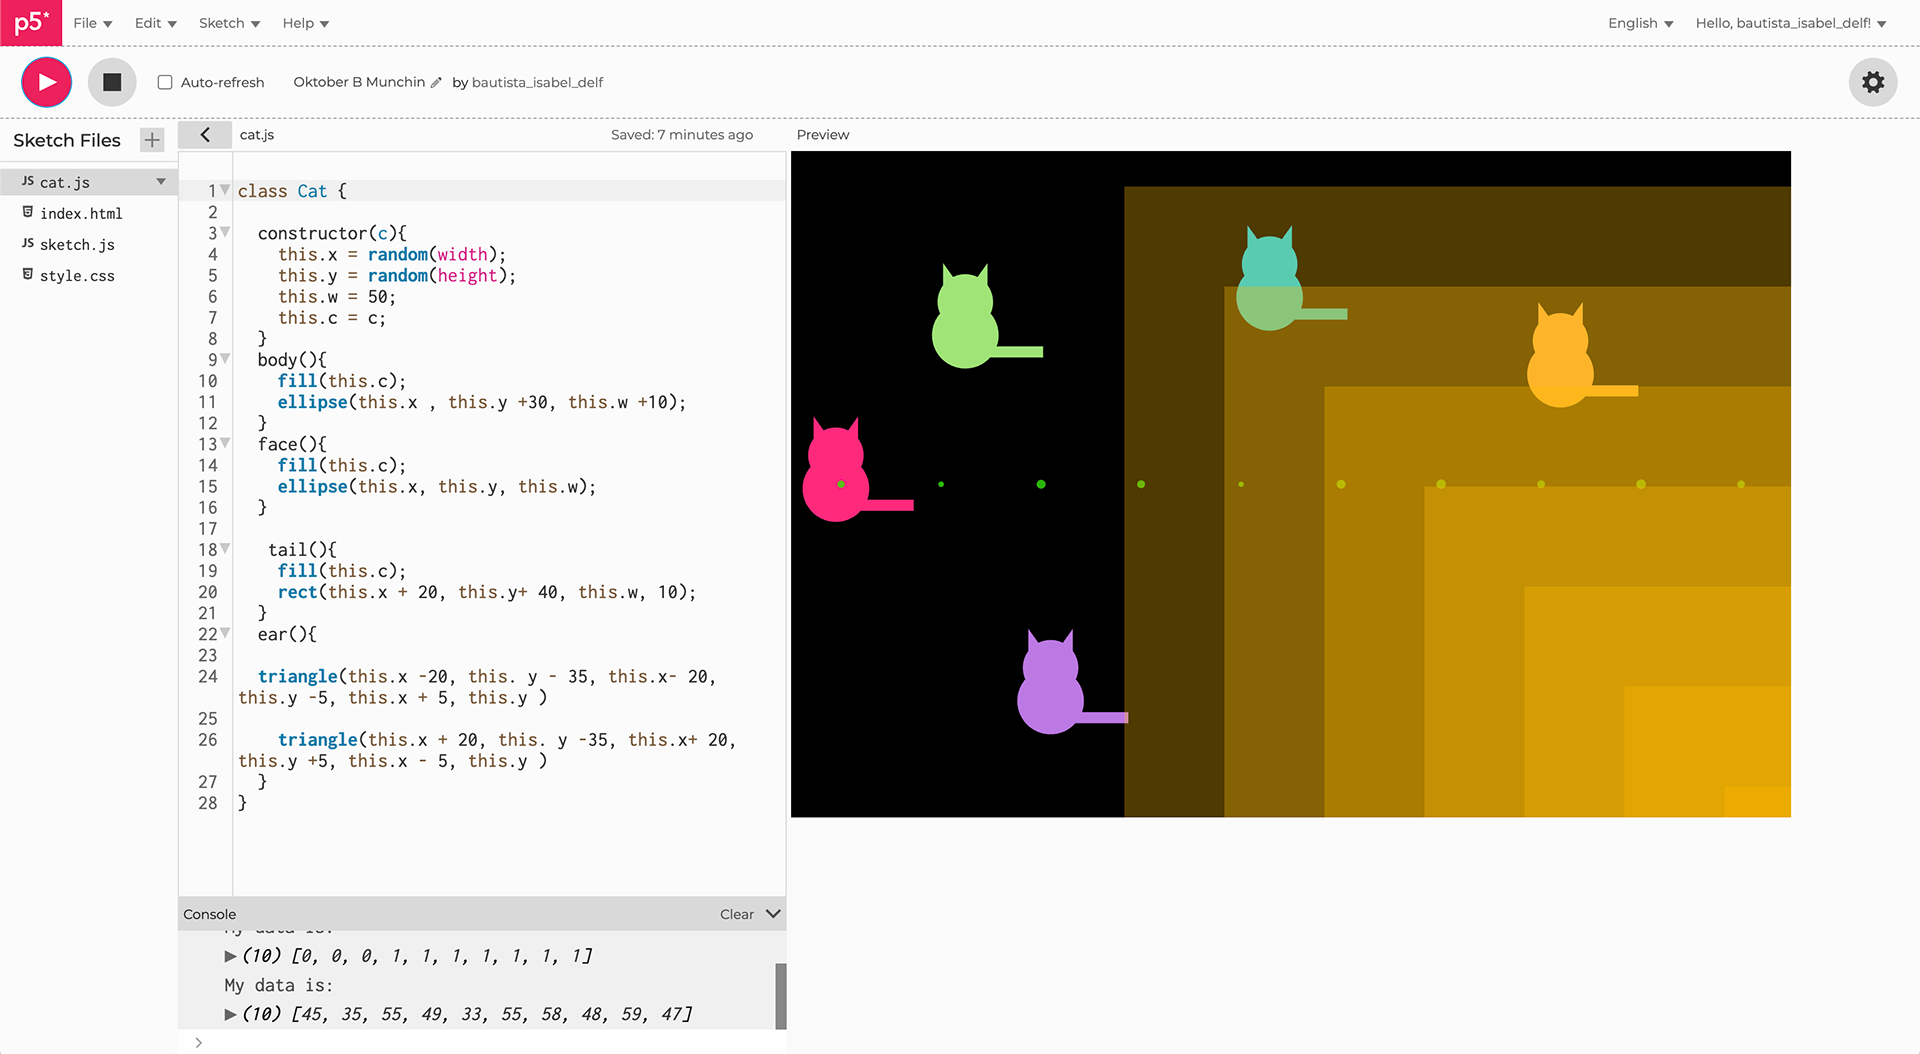
To understand the relationship between the components and their actions, I needed to document how the system responds—either when the button is pressed or when the photocell captures different levels of light. This breakdown of information helps me create variables and consider the functions that would be involved, a sort of guide as to whether I want to utilize these data sets to change the color or scale of my sketch.
Next Steps
As I move forward with the visual representation, I am considering how to incorporate time and oscillation skills that we learned through mapping, rotation, and angles to transform a static sketch into a more dynamic one. To test variations of the sketch, I will connect the board so that it can continue to gather data during the day, and will post an update as soon as possible!
Check out the code for yourself! Below is the code I used for P5.js (Here is the link: Oktober B Munchin). I gotta go feed Oktober before she riots. Have fun!
Class.js
class Cat {
constructor(c){
this.x = random(width);
this.y = random(height);
this.w = 50;
this.c = c;
}
body(){
fill(this.c);
ellipse(this.x , this.y +30, this.w +10);
}
face(){
fill(this.c);
ellipse(this.x, this.y, this.w);
}
tail(){
fill(this.c);
rect(this.x + 20, this.y+ 40, this.w, 10);
}
ear(){
triangle(this.x -20, this. y - 35, this.x- 20, this.y -5, this.x + 5, this.y )
triangle(this.x + 20, this. y -35, this.x+ 20, this.y +5, this.x - 5, this.y )
}
}
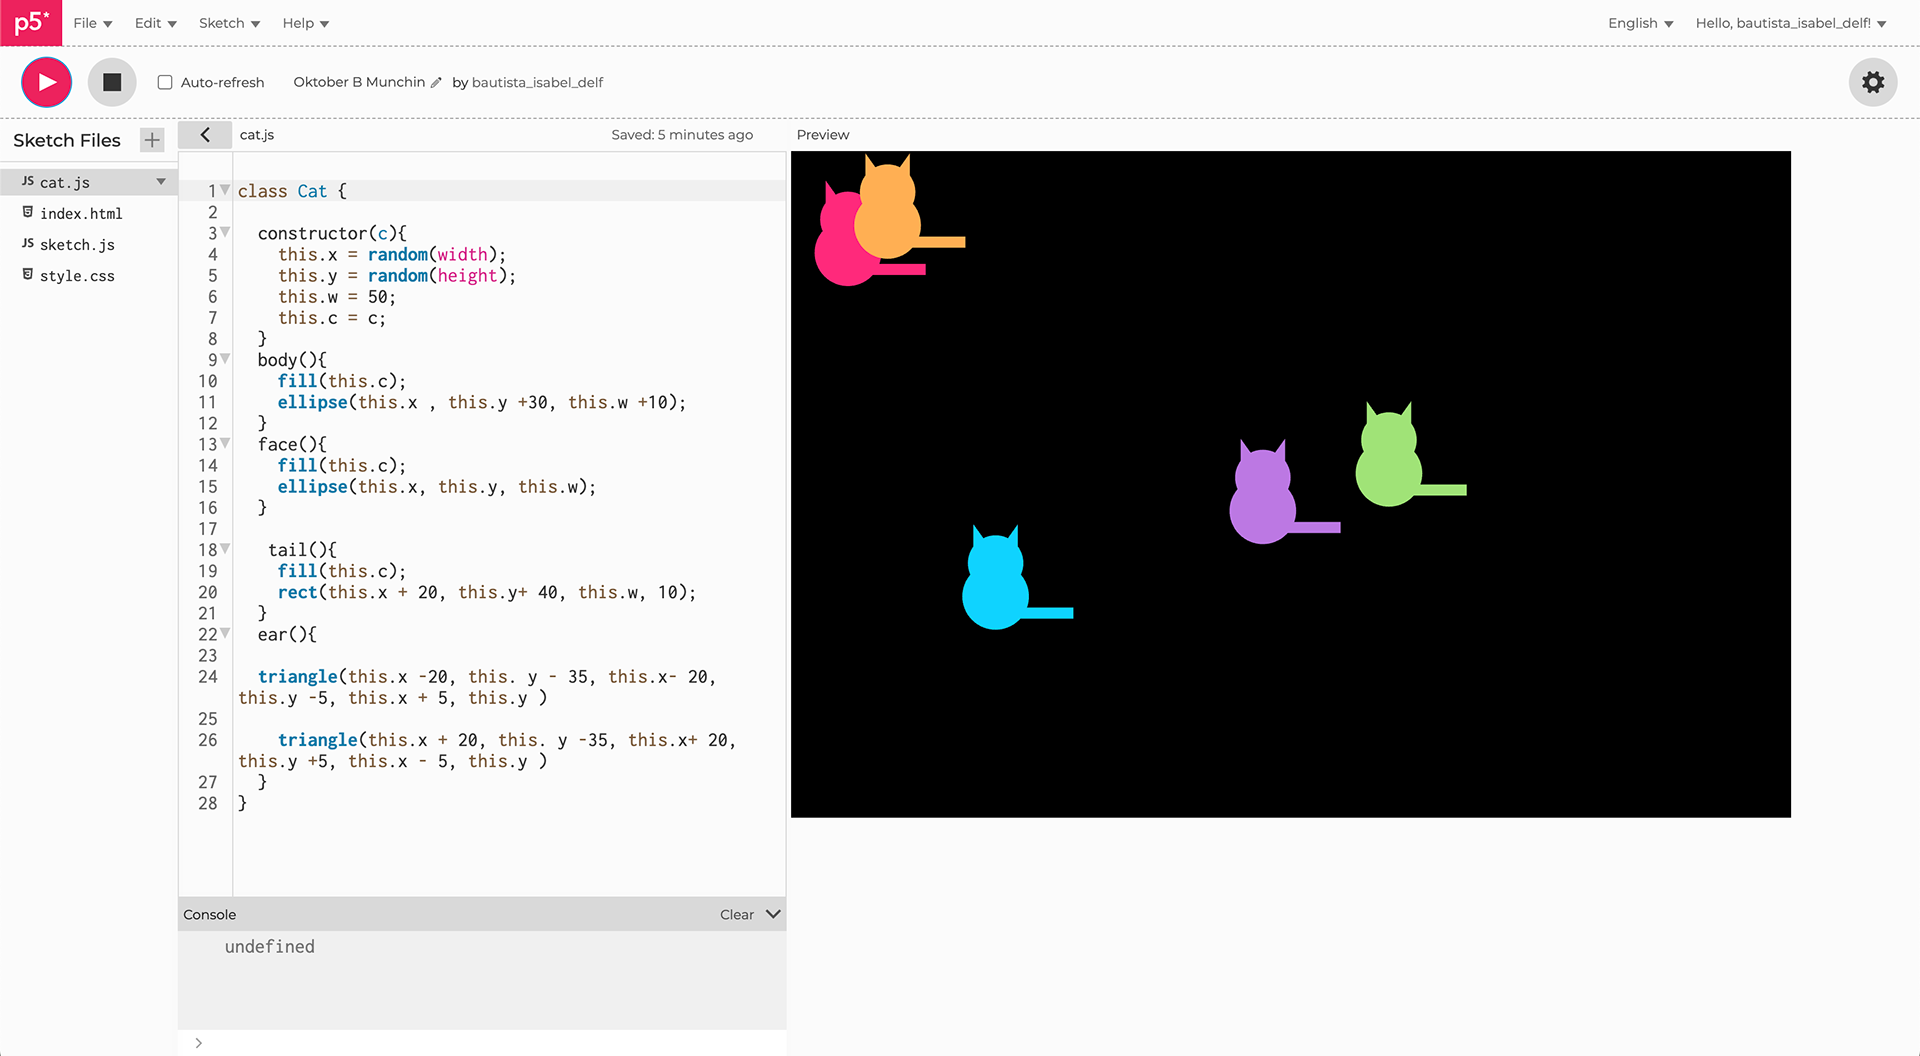
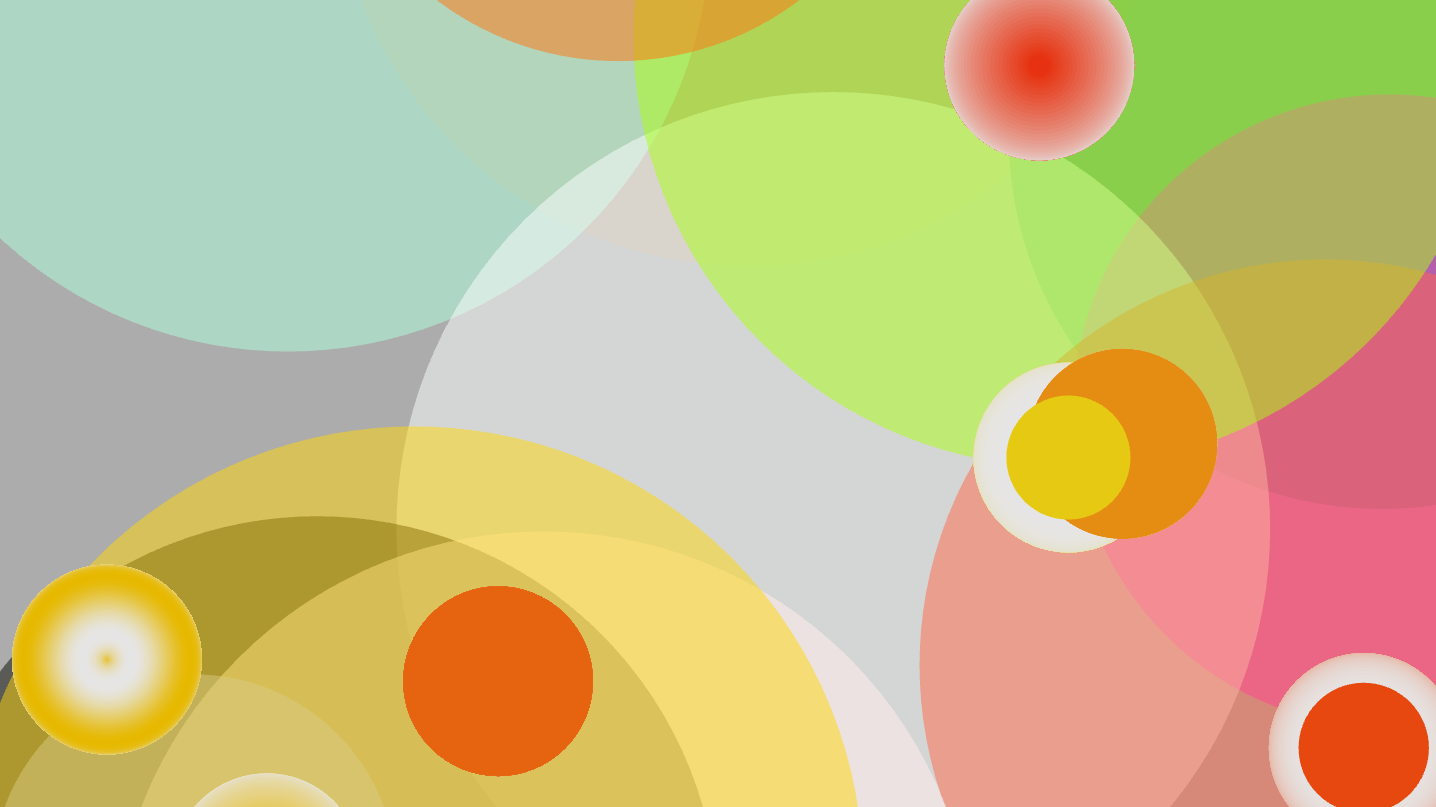
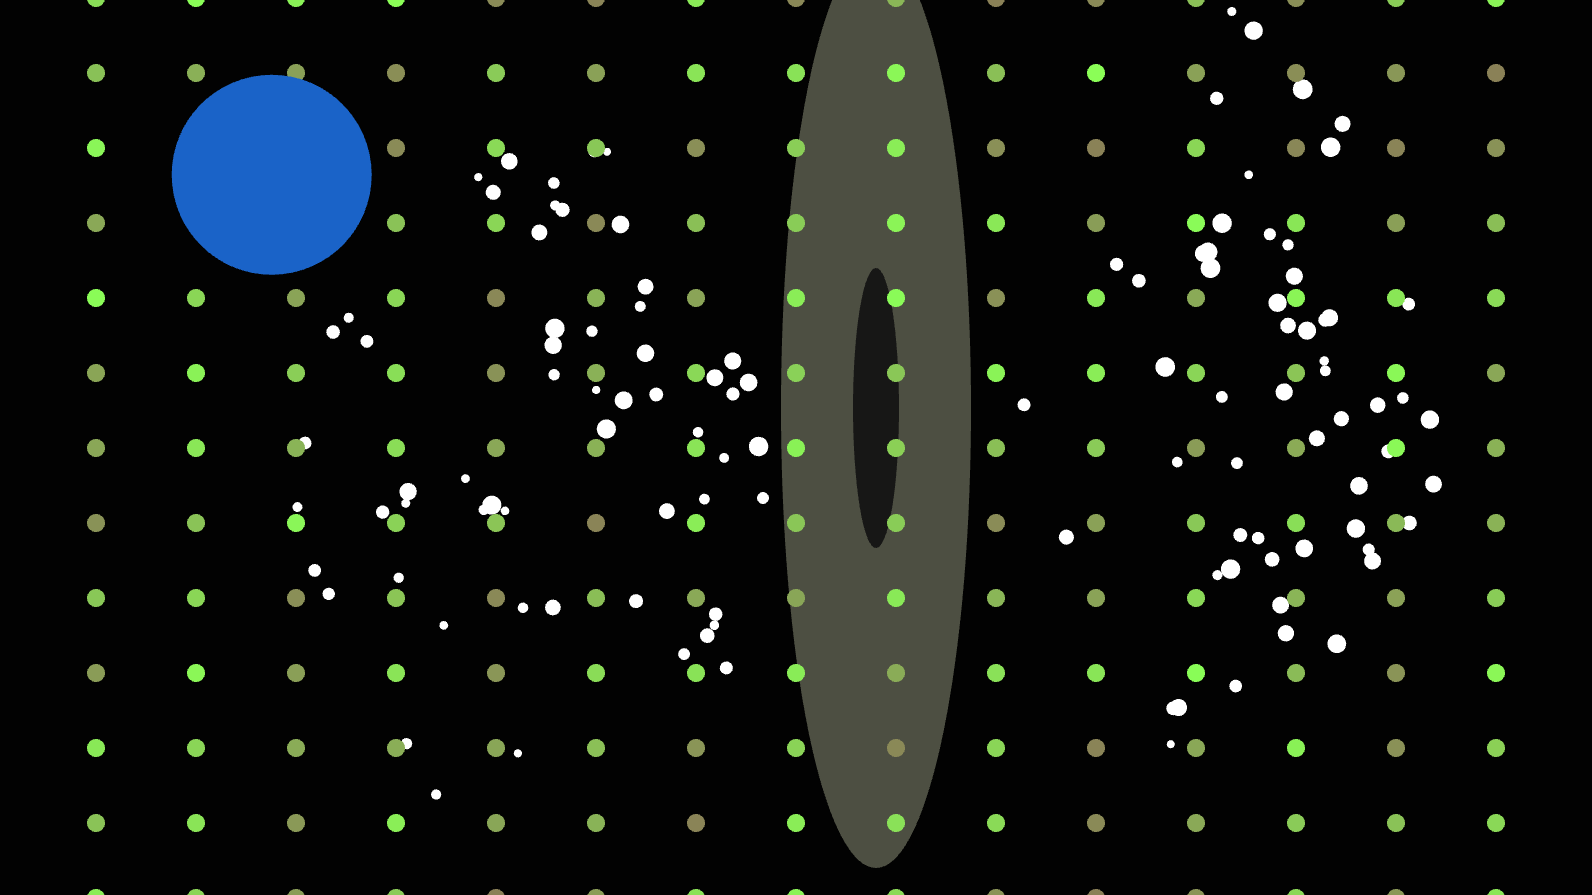
code with sketch
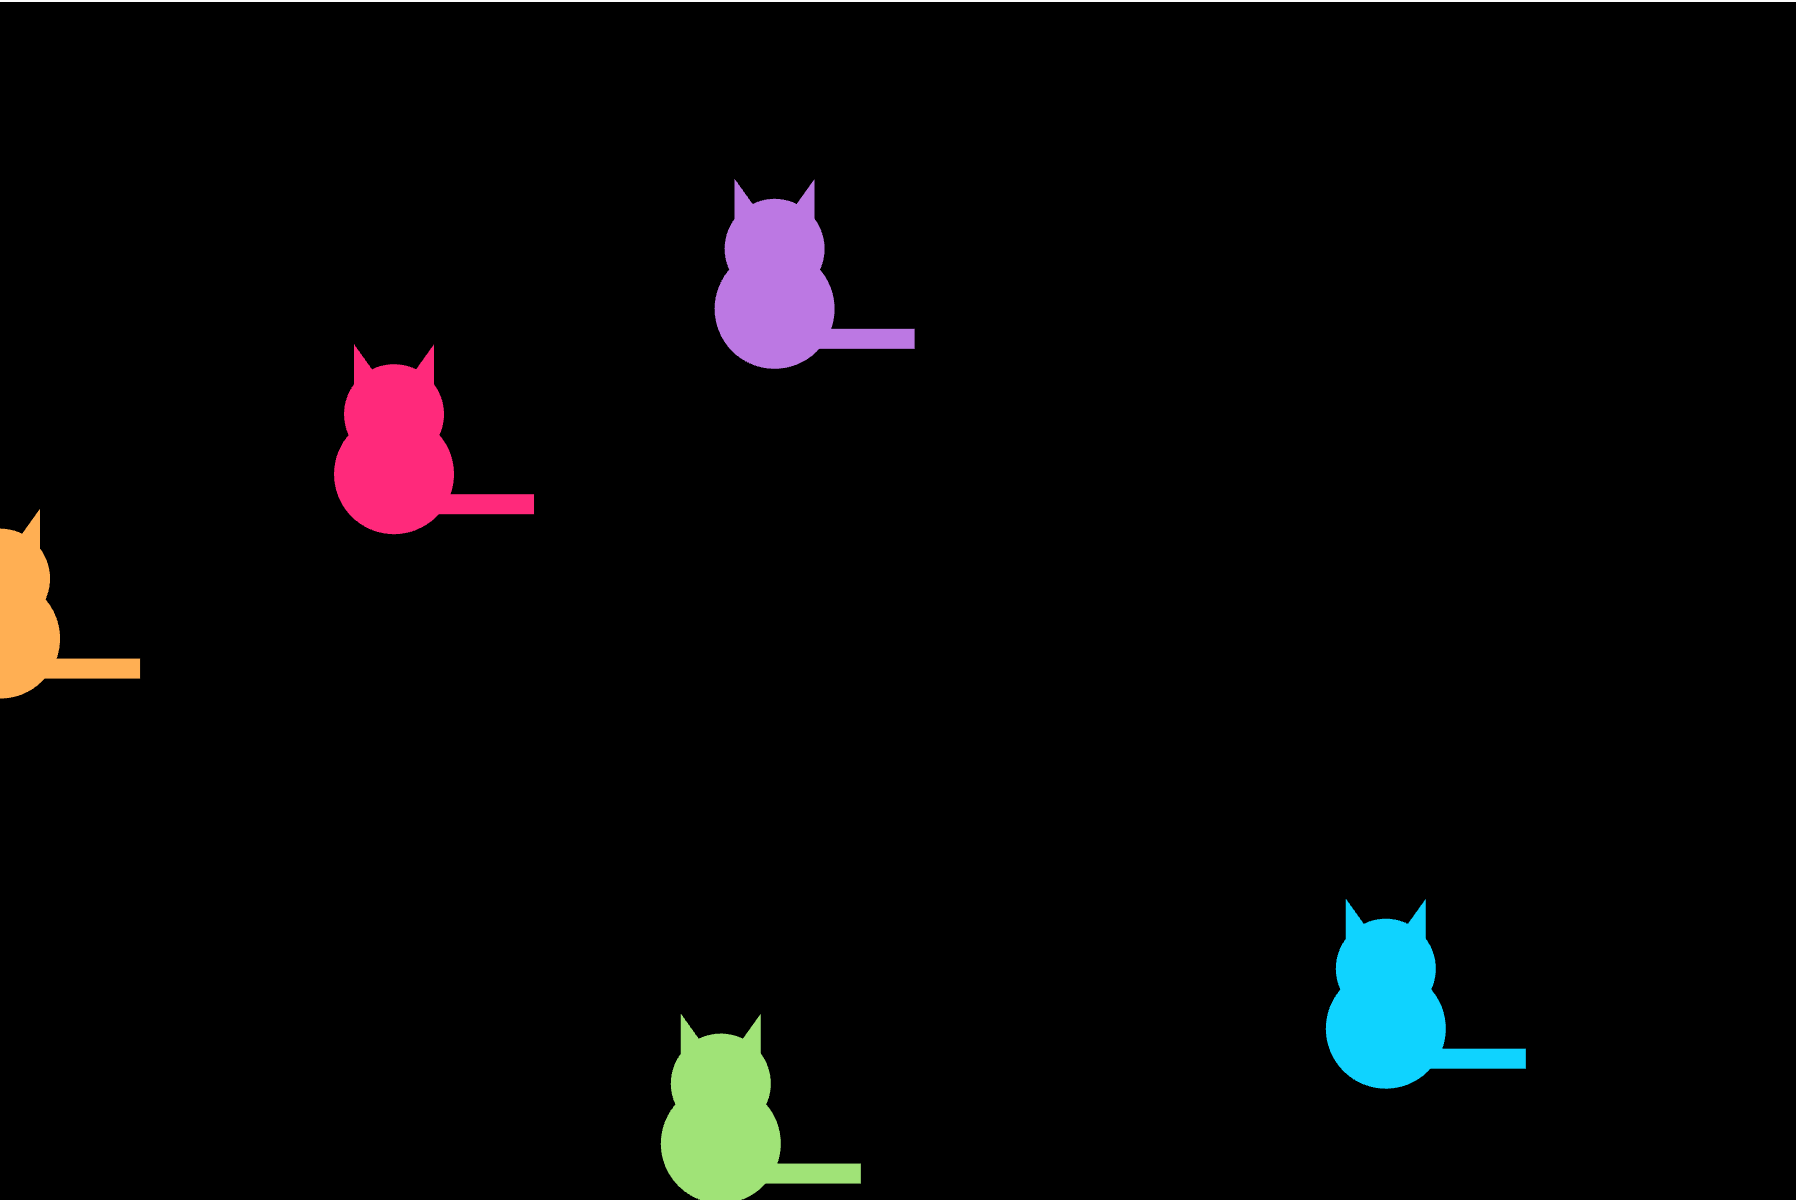
sketch of executed code
Oktober B Munchin Sketch
// remember to create the cat class in a separate file or transfer it into one js file if that is what your heart desires
let myData;
let basePhotoURL = "https://io.adafruit.com/api/v2/isabelb23/feeds/photo-feed"
let baseButtonURL = "https://io.adafruit.com/api/v2/isabelb23/feeds/button-feed"
let dataOption = "/data"
let limitQuery = "limit="
let limitNumber = 10
let includeQuery = "include="
let basePhotoURL = "https://io.adafruit.com/api/v2/isabelb23/feeds/photo-feed"
let baseButtonURL = "https://io.adafruit.com/api/v2/isabelb23/feeds/button-feed"
let dataOption = "/data"
let limitQuery = "limit="
let limitNumber = 10
let includeQuery = "include="
let photoValues = [];
let buttonValues = [];
let buttonValues = [];
let intervalID;
let intervalID2;
let intervalID2;
let cats = [];
let colors = [];
let colors = [];
function setup() {
createCanvas(900, 600);
noStroke();
colors[0] = color(255, 41, 123);
colors[1] = color(13, 211, 255);
colors[2] = color(255, 175, 84);
colors[3] = color(159, 227, 120);
colors[4] = color(188, 120, 227);
for (let i = 0; i < 5; i++){
cats[i] = new Cat(colors[i]);
}
intervalID = setInterval(getPhotoFeedData, 5000);
intervalID2 = setInterval(getButtonFeedData, 5000);
console.log(myData);
}
function draw() {
background(0);
for (let i = 0; i < 5; i++){
cats[i].body();
cats[i].face();
cats[i].tail();
cats[i].ear();
}
if(photoValues.length > 0){
photoValues.forEach((value, i)=>{
fill(55, 230, 10, 200);
let diameter = map(value, 0, 4095, 0, height)
circle(width/limitNumber*i + width/limitNumber*0.5, height*0.5, diameter);
})
}
if(buttonValues.length > 0){
buttonValues.forEach((value, i)=>{
fill(252, 186, 3, 80);
let diameter = map(value, 0, 4095, 0, height)
square(width/limitNumber*i + 1/2*height, width/limitNumber*i + 32, 705);
//circle(width/limitNumber*i + width/limitNumber*0.5, height*0.5, diameter);
})
}
}
// Photo Feed
function getPhotoFeedData(){
myData = loadJSON(basePhotoURL+dataOption+"?"+limitQuery+limitNumber+"&"+includeQuery+"value", handlePhotoData, handleError);
}
function getPhotoFeedData(){
myData = loadJSON(basePhotoURL+dataOption+"?"+limitQuery+limitNumber+"&"+includeQuery+"value", handlePhotoData, handleError);
}
function handlePhotoData(data){
console.log("My data is: ");
// console.log(data[0].value);
photoValues = [];
data.forEach((d0) =>{
photoValues.push(parseInt(d0.value))
})
console.log(photoValues);
}
console.log("My data is: ");
// console.log(data[0].value);
photoValues = [];
data.forEach((d0) =>{
photoValues.push(parseInt(d0.value))
})
console.log(photoValues);
}
// Button Feed
function getButtonFeedData(){
myData = loadJSON(baseButtonURL+dataOption+"?"+limitQuery+limitNumber+"&"+includeQuery+"value", handleButtonData, handleError);
}
function getButtonFeedData(){
myData = loadJSON(baseButtonURL+dataOption+"?"+limitQuery+limitNumber+"&"+includeQuery+"value", handleButtonData, handleError);
}
function handleButtonData(data){
console.log("My data is: ");
// console.log(data[0].value);
buttonValues = [];
data.forEach((d0) =>{
buttonValues.push(parseInt(d0.value))
})
console.log(buttonValues);
}
console.log("My data is: ");
// console.log(data[0].value);
buttonValues = [];
data.forEach((d0) =>{
buttonValues.push(parseInt(d0.value))
})
console.log(buttonValues);
}
function handleError(){
console.log("Sorry, there was an error. It was: " + error);
}
console.log("Sorry, there was an error. It was: " + error);
}
code with sketch